She looks a thing of flawless geometric perfection. WAY nicer sausage-making than my repeated butchery method!
You are using an out of date browser. It may not display this or other websites correctly.
You should upgrade or use an alternative browser.
You should upgrade or use an alternative browser.
4' (AKA 5 foot) Falcon build
- Thread starter RealDaveWinter
- Start date
Currently scripting and putting together some imagery for my next video, tentatively titled 'Episode V: Ratio of the Jedi'. I should be able to record it and post it next week sometime.
In the mean time, I'm still working on sizing and fitting the lower hull domes. I'd like to do a video covering that too, but it's a bit hard to film that, and do the work.
I also received a couple of kits this week. I think I have just about all the ones I'm going to purchase. Those that I'm not, I have castings of the parts I need. I'm not going to spend $3500 CAD for a kit from which I only take a couple of parts, castings will have to suffice.
We stand on the shoulders of the past Falcon Studio Scale veterans (and some of those newly addicted).She looks a thing of flawless geometric perfection. WAY nicer sausage-making than my repeated butchery method!
Work on installing the lower hull domes continues.
To help get my radii correct, I have designed and printed a radius bar. Well, the attachments for it anyway. The bar itself is off the shelf Canadian Tire 1" square 6061 aluminum stock. The pivot end slides down onto a post fitting that fits snugly into my central hub top and bottom. The other is a spring loaded 'Sharpie Pen' holder that is held in place by a little set screw. That allows me to set it at whatever radius I need and draw a perfect arc. The "spring" isn't very strong, but does give just enough pressure on the pen to keep it pressing down.
I've ordered an adhesive ruler strip with metric and imperial measurements on it that I can apply on top of the aluminum bar. If I'd used a tape measure placed on the hull, I'd have to fudge the measurements to accommodate the curve of the hull. With this tool, I get orthographic measurements.
Not only is this useful for drawing the outside radii, but I can also use it to locate all the corners and centre points for the various holes that need to be cut into the domes.
This is probably over engineered, but that's just how I roll.
A small update on my build for those interested. Things have been a bit slower than I would like, but I'm still getting things done.
I'm planning on making some changes and updates to the cockpit, specifically the fan in the back. Now that I have the correct fan on order, I'm going to rework that part of the build.
Most of the past little while has been on the mandibles. Specifically the 8 mechanical pits.
The tubs themselves are made from 1mm sheet styrene. I added a 3mm strip around the top edge simply to provide a little bit more gluing surface. The four that are squared off are done so to accommodate the aluminum tube that goes through the mandible structure. ILM did the same thing.
Port - Lower - Forward
90% complete. There's a small 'gear' like part that I'm missing. I've not figured out what kit it comes from, if it comes from a kit at all. It may be an actual gear, but based on some up close photos, I'm not convinced of that. The part maps call for it being N45 of the Hummel, but that's not correct. N45 is much too small. If anyone can confirm if it's a kit part, or an actual gear, that alone would be helpful.
View attachment 1888856
Starboard - Upper - Rear
Complete. Just the one casting here. I made it from the original part, but I am not sure if that part is used in other places yet, so I made a cast instead of using the real part.
View attachment 1888855
Starboard - Lower - Rear
90% complete. Just missing the Elephant part, lower right. The kit is currently stuck in some Canada Post depot so I guess it shows up when it shows up after the strike is over. Thanks to Shamon for helping get the orientation of the Scammel part correct. The Bandai PG kit is very helpful, but you really do need to triple-check photo references. Either on purpose or by accident, the Bandai kit does have some things wrong.
View attachment 1888857
Port - Upper - Forward
Complete. Just the one casting here as well. The Sealab grill lower left. I have pretty much cast the complete Sealab kit at this point.
View attachment 1888858
The Others
The remainder four are all waiting on parts before I start assembling, but I've gathered what I do have into the little tubs I made. I'm trying to source the one kit that is required for the top two. I know the kit I need, I just can't find one for sale.
The other two, on the bottom, have kits on the way but they're currently stuck with Canada Post.
View attachment 1888859
So, there's where I am. I'm off until January, so hopefully I can make a bit of progress on this beast.
thanks for looking.
HEY!
I think I found the Port Lower Forward mandible maintenance pit "missing gear mystery greeblie."
It's from the original Bandai 1/15 German Tank IV-F2, in this boxing:
The part does NOT come in the subsequent Entex boxing that calls it the "german panzer IV f2" and which is, typically, much easier to find and usually a lot cheaper.
Here's the JCoffman Parts Map pictures for reference:
Notice on JCoffman's pic 2 and 3 above how a.) the part "hovers" above the tank deck it sits on, and b.) how the part has a "rounded upper section" as well as "downward tapering" fins, and c.) how "short" the downward curve/section of pipe is that goes into it, indicating how "tall" the actual greeblie is?
Here's my pit with the MPC X-Wing hack of the "closest approximation we could find" approach:
Not "too bad" given that the X-Wing piece has an OD of 10.6mm and can be made to "hover" somewhat approximating the real deal. But see how long my lower curve pipe section is, indicating that the greeblie is way too "low"?
Now here's the real piece next to it:
All problems of a, b, and c solved with this: hovering greeblie, downward taper, and much shorter pipe section going into it.
Here's an overhead shot for comparison:
On the real greeblie, the OD is 10.97mm, and the height is 8.11mm.
So, mystery solved: it is categorically NOT from the Hummel kit.
It is Part # F37 from the Bandai 1/15 German Tank IV-F2, No 4101-2500.
Thanks to RealDaveWinter, Shamon, JCoffman, eagle1, Searun, and Bjorn for the inspiration to find this little fella...
(And yes, of course, I'll make castings if anyone needs one.)
That definitely looks like that's the part. And likely the reason we've not found it before, we all have one of the newer boxings. I really do hate it when kit manufactures remove parts from kits. If a part isn't used, just update the instructions, don't muck with the plastic. Anyway, that looks like a mystery solved after 40ish years.
Great job. Now get ready to make 50 castings... lol.
thanks
Great job. Now get ready to make 50 castings... lol.
thanks
Last edited:
O….M….G
Well done sir!!
Well done sir!!
A new video posted today. This one is math related, but describes a couple of ways I do my reverse engineering of photos. Also a shout out to a certain someone towards the end.

 youtube.com
Building a 'Studio Scale' Millennium Falcon From Star Wars (1977)
A series of videos documenting my build of the 4 foot, 'Studio Scale' Millennium Falcon. The build is the same size, and uses all the same detail parts, as t...
youtube.com
Castings of F37 in the junkyard now.
Awesome. I'm looking forward to finishing that one last mechanical bay.
Work continues on my build with the lower hull dome in place. The outer diameter has been rough cut along the forward section where it is the same diameter as the inner core, but the remainder, where it extends over to create a lip, hasn't been cut down yet. Regardless, consider everything here a very rough cut and obviously not at final dimensions.
The domes are secured via 5 minute epoxy and framing nails. The seams and any small divots from the nails will get smoothed with expoxy bondo, even though all the seams are covered by walkways, or mandible boxes, etc... It'll all be invisible once covered with parts, armour plate, and painted.
The lower gun platform, and lower rear deck, are just there for kicks. I put blue tape marked Port and Starboard (P&S) just so I remember that it's upside down and get my walk ways on the right way.
Anyway, that's where I am. I've written the scripts for the next two videos, so should have those up on YouTube in a couple of weeks I hope.


thanks
The domes are secured via 5 minute epoxy and framing nails. The seams and any small divots from the nails will get smoothed with expoxy bondo, even though all the seams are covered by walkways, or mandible boxes, etc... It'll all be invisible once covered with parts, armour plate, and painted.
The lower gun platform, and lower rear deck, are just there for kicks. I put blue tape marked Port and Starboard (P&S) just so I remember that it's upside down and get my walk ways on the right way.
Anyway, that's where I am. I've written the scripts for the next two videos, so should have those up on YouTube in a couple of weeks I hope.
thanks
Last edited:
Dang.
She looks good -- I especially like the flush mount rear landing gear bay -- looks ready to be rock solid, and receive retractable landing gear if you should want to go that route.
Nice work!
She looks good -- I especially like the flush mount rear landing gear bay -- looks ready to be rock solid, and receive retractable landing gear if you should want to go that route.
Nice work!
Thanks.
I have no plans for landing gear. I'm keeping to the functionality the 76/77 filming model had as closely as I can. Lights and working fans the extent of it. I read someplace that the cockpit was supposed to rotate. I'm not sure if that's true, but I have no plans to do that with mine, even if it is true.
That white landing gear box frame is 3D printed, but gets covered in styrene so none of the printing shows through. I'm assuming ILM made theirs completely out of acrylic. Mine will be styrene on that ABS frame. I know it's not how ILM did it, but I don't feel too bad about using prints if it all gets hidden under styrene. ILM didn't use ABS 1/4 domes either, so I'm already straying from 100% accurate.
Oh right, yes. I forgot about those. I thought those holes were just covered over?
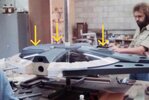
The only photo I've seen of landing gear being created was clearly an Empire Strikes Back BTS photo. Either way, I have no plans for landing gear. I have never seen any photos of LG deployed in its original 'New Hope' configuration, so I'm just assuming they were never implemented.
Good photo though. A handy reminder.
Last edited:
Shamon
Active Member
I've never seen a picture of a landing gear either, so maybe I didn't actually make it. However, If the hatch that does not open, it should be enough to reproduce the rectangular mold with a styrene board, but why did they bother to make a rectangular hole in such a think acrylic plate? I like to fantasize about these things. lol
Attachments
Where do you find all those photos? That's another one I've never seen before. Interesting that it's acrylic and wooden block.