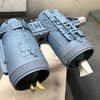
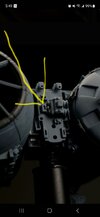
Nice! Love the contrast of blue and grey. Did not realize how much grey is left on the finished product. Can you post images of the bottom Bret?
You are using an out of date browser. It may not display this or other websites correctly.
You should upgrade or use an alternative browser.
You should upgrade or use an alternative browser.
Let's Build a TIE Bomber! - Final Pics
- Thread starter Boxcar Bret
- Start date
My pleasure.Thank you Sir
stevielewis
Sr Member
Great looking photos! 

Brilliant. Bret did you free hand the pencil lines?
July 31, 2024
Let's wrap it up! Seriously, this is it!
It was time to do all those little pencil hash marks. I love that ILM used this technique even for the panel lines on some ships. I'm pretty sure the star destroyer model I saw had them. The plan was simple: get out my reference and part map, take a small, thin piece of sheet styrene, get in the zone and knock it out.
I started in on one of the wings and nope. It just wasn't happening. I found that using the styrene as a straight edge really impeded my visibility and made it difficult to judge the length of the marks. I'd try again later.
Later. The next day (maybe). Tried a different approach: do it freehand. I should mention I went back and forth between an regular pencil and an inexpensive mechanical one. To be honest I don't remember which one I landed on but I'm pretty sure it was the mechanical one.
In comparing the parts map and my reference photos I found some discrepancies. Mainly that the marks are not symmetrical on the wings. They are in some areas and pretty loose in others. I kept mine loose. Really loose. But you know me, I like it funky.
FULL DISCLOSURE: I forgot to take photos documenting the process so here's a picture of a pencil.

It was time to address the weird discoloring on the back half of one of the fuselages, the "cones" of the engines and inside the engines.


Through the grapevine I learned the original color was a byproduct of grey automotive primer applied and wiped off. It's safe to assume that age has also influenced the hue it is now.
John Simmons told me that he used enamel Reefer Grey Light and applied it like an oil wash. I'm a big fan of oils and, in fact, use them almost exclusively for all my weathering so I decided to try mixing up something close and do some tests on my paint mule, a X-wing body painted Stormy Sea.
Nothing was rocking me so I thought I'd give the Reefer Grey Light a try. The only thing was my paint was acrylic, not enamel. Not being deterred I compared the color and although it looked close it was missing something. Under the influence of the harsh flash in the photos it had a very subtle pink tone to it. I added what I called "a wet mouse fart" of Caboose Red to the grey and slowly mixed it in.


That looked like it got me on target and after playing with the pressure on the airbrush I was able to recreate the effect on the paint mule.

From there I loosely make off the area I wanted to paint.

It took a couple tries a'la Goldilocks to get it right. That push/pull that any model builder can relate to. The first one was too dark.

I tried to but a light coat of Stormy Sea over it, over compensated and made it practically disappear.

I came back with the custom mix again and landed exactly where I wanted to be.


It takes on different strengths depending on the intensity of the light source.
"Here's where the fun begins"

I love working with oils. This goes back to when I built scale armor models. There are hundreds of weathering products out there but for my money the amount of control you have and the effects you can achieve with oils are almost limitless. I'm not going to give a lesson on using them because there are some great instructional videos out there but these are the key techniques I use that really help me achieve the results I'm looking for:
1. I don't use a clear coat.
2. I use a hairdryer to dry the paint as I go.
3. I don't rely on a single color for an effect.
That said, I proceeded to dive in and over the course of one to two hour sessions over three or four days I achieved that aged, dusty paint, straight from the archives in its current state look I was going for.


And just like that, it was finished.
Stay tuned for the big sexy time final pics this weekend!
Let's wrap it up! Seriously, this is it!
It was time to do all those little pencil hash marks. I love that ILM used this technique even for the panel lines on some ships. I'm pretty sure the star destroyer model I saw had them. The plan was simple: get out my reference and part map, take a small, thin piece of sheet styrene, get in the zone and knock it out.
I started in on one of the wings and nope. It just wasn't happening. I found that using the styrene as a straight edge really impeded my visibility and made it difficult to judge the length of the marks. I'd try again later.
Later. The next day (maybe). Tried a different approach: do it freehand. I should mention I went back and forth between an regular pencil and an inexpensive mechanical one. To be honest I don't remember which one I landed on but I'm pretty sure it was the mechanical one.
In comparing the parts map and my reference photos I found some discrepancies. Mainly that the marks are not symmetrical on the wings. They are in some areas and pretty loose in others. I kept mine loose. Really loose. But you know me, I like it funky.
FULL DISCLOSURE: I forgot to take photos documenting the process so here's a picture of a pencil.
It was time to address the weird discoloring on the back half of one of the fuselages, the "cones" of the engines and inside the engines.
Through the grapevine I learned the original color was a byproduct of grey automotive primer applied and wiped off. It's safe to assume that age has also influenced the hue it is now.
John Simmons told me that he used enamel Reefer Grey Light and applied it like an oil wash. I'm a big fan of oils and, in fact, use them almost exclusively for all my weathering so I decided to try mixing up something close and do some tests on my paint mule, a X-wing body painted Stormy Sea.
Nothing was rocking me so I thought I'd give the Reefer Grey Light a try. The only thing was my paint was acrylic, not enamel. Not being deterred I compared the color and although it looked close it was missing something. Under the influence of the harsh flash in the photos it had a very subtle pink tone to it. I added what I called "a wet mouse fart" of Caboose Red to the grey and slowly mixed it in.
That looked like it got me on target and after playing with the pressure on the airbrush I was able to recreate the effect on the paint mule.
From there I loosely make off the area I wanted to paint.
It took a couple tries a'la Goldilocks to get it right. That push/pull that any model builder can relate to. The first one was too dark.
I tried to but a light coat of Stormy Sea over it, over compensated and made it practically disappear.
I came back with the custom mix again and landed exactly where I wanted to be.
It takes on different strengths depending on the intensity of the light source.
"Here's where the fun begins"
I love working with oils. This goes back to when I built scale armor models. There are hundreds of weathering products out there but for my money the amount of control you have and the effects you can achieve with oils are almost limitless. I'm not going to give a lesson on using them because there are some great instructional videos out there but these are the key techniques I use that really help me achieve the results I'm looking for:
1. I don't use a clear coat.
2. I use a hairdryer to dry the paint as I go.
3. I don't rely on a single color for an effect.
That said, I proceeded to dive in and over the course of one to two hour sessions over three or four days I achieved that aged, dusty paint, straight from the archives in its current state look I was going for.
And just like that, it was finished.
Stay tuned for the big sexy time final pics this weekend!
Attachments
stevielewis
Sr Member
Really nice painting work. I think you got the coloring just right. 

August 4, 2024


That's a wrap folks! What a journey it's been. I feel like I've really grown as a model builder with this one. On top of learning about IDing parts and new techniques and tools, I taught myself how to cast resin parts and learned the art of patience and how to recover from mistakes and crack on in new ways.
Special "Thank You's" in no particular order to...
Chris Lawson
Jonathan Faber
Matthew Henricks
Carter Cooksey
Jason Eaton
John Simmons
Andy Preston
Lee Ralph
and everyone on the RPF and Facebook for their words of encouragement that kept me motivated when things seemed iffy. See you on the next adventure!
Spectacular, Bret what are those gold colored parts please
What gold parts?Spectacular, Bret what are those gold colored parts please
stevielewis
Sr Member
Fabulous build, Brett! If I ever should decide to build a Tie Bomber your build thread will be where I go for inspiration. Thank you for sharing. 

Ah. It’s the tip of a wiring plug or in this case brass rod in a piece of brass tubing.That tiny gold part, or is it a trick of the light
I would hardly call the armature a small part. Besides, it was you and that dumb Tested video got me into this! LOLBeautiful build brett! Happy to be even a small part of your build. Where's the rear pylon cover?
The rear cover was intentionally left off for that straight from the archives “We can’t find it” look.
Haha! Thanks!I would hardly call the armature a small part. Besides, it was you and that dumb Tested video got me into this! LOL
The rear cover was intentionally left off for that straight from the archives “We can’t find it” look.
Oh okay got it. I like it.


