Kosh Play

Sanding is sculpting.

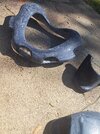
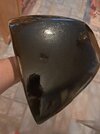
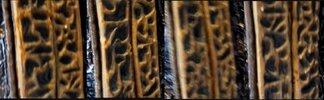
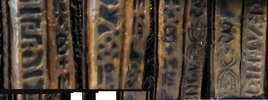
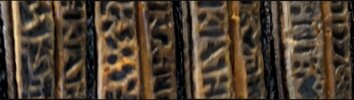
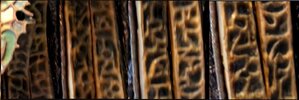
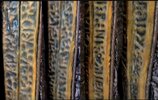
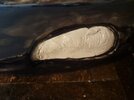
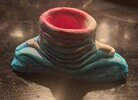
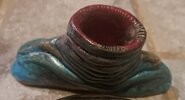
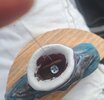
On the glossy pics, I hope it comes out for you to see, but what looks black indoors is a magnificent display of colors in the sun. Black, blue, purple.

The idea is that each layer of resin applied had black pigment, but also some Cryptotec, it turns purple in the sun. It becomes a swirly, spacy, irregylar pattern after layer upon layer.

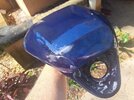
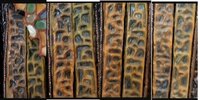
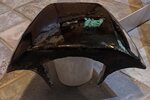
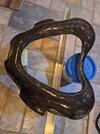
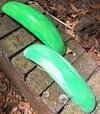
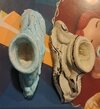
Kosh will be painted with color-chabging paint which starts similar to Kosh's usual yellow, but turns green or orange depending on the angle. The swirly base underneath will hopefully help make Kosh look like he isn't just a solid shell from this world.

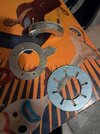
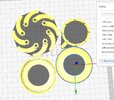
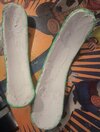
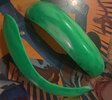
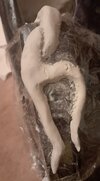
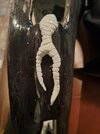
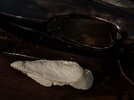
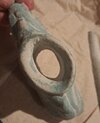
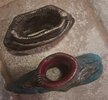
Also, more riduculously OCD fine-tuning the body with FreeForm Air.

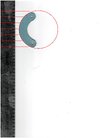
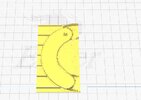
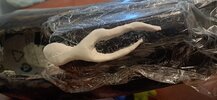
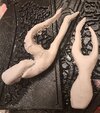
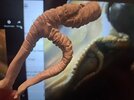
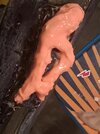
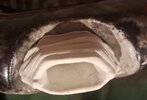
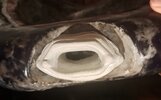
Recreating poses of Kosh and adding and sanding for accuracy.
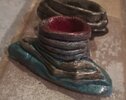
 

Attachments

  • 20230207_132551.jpg
    20230207_132551.jpg
    4.2 MB · Views: 167
  • 20230207_140559.jpg
    20230207_140559.jpg
    1.7 MB · Views: 130
  • 20230207_140658.jpg
    20230207_140658.jpg
    4.6 MB · Views: 162
Having fun with iris doors!?!?
Not really, just trying different mechanisms.
One is space efficient, but relies on flimsy door panels, and has gears in the casing. Neat! But delicate, and the floating ends can go out of whack


The second has pins on both ends of the door panels, one points up to interact with the base, the other points down to interact with the switch/rotating mechanism. I made the panels out of metal, but then went back to my old 3D cheat technique of scan it next to a ruler and use different shades of grey for different heights.

Why not use the metal panels? Because the panels have to slide over each other, and the part of the panel that sticks out was interfering with the mechanism
 

Attachments

  • irisdoor 001.jpg
    irisdoor 001.jpg
    230.4 KB · Views: 148
  • irisdoorhalfinchmarkers.jpg
    irisdoorhalfinchmarkers.jpg
    30.8 KB · Views: 130
  • irisdoor 002.jpg
    irisdoor 002.jpg
    415 KB · Views: 130
  • 2dto3dIris.JPG
    2dto3dIris.JPG
    60.4 KB · Views: 111
  • IrisLessSpace.JPG
    IrisLessSpace.JPG
    108.3 KB · Views: 126
Argh! Panels don't conceal everythibg behind em. Try a reprint with no support, no brim, see if the raw, nakes model works.

Using this model, blade a65 ros 30 at %120 size


Attachments

  • 20230227_204532.mp4
    20 MB
Since Karaoke now uses the word "tryna," so will I.

I am tryna git good pics of the sash. Also, do I wanna tryna make a good, semi-accurate left or right sash, then reverse it for the other side.

The left seems to have neater details, and I am tryna get a good shot of them there details to scuplt 'em outta clay n mold outta rubber.

Once you open Task 16, it goes bad kinda fast, so I am tryna do all that rubber pourin 'round the same time.

I though about tryna use the 3D method for the sash, but I do not have head-on 90 degree shots of the details, so, I will hafta sculpt as close as I can, then make a mold outta Sorta Clear or Rebound 25, then cast in Task 16
 

Attachments

  • LedtMidUpper4.jpg
    LedtMidUpper4.jpg
    375.4 KB · Views: 111
  • LeftBottom4together4.jpg
    LeftBottom4together4.jpg
    350 KB · Views: 129
  • LeftMiddle4Together.jpg
    LeftMiddle4Together.jpg
    334.5 KB · Views: 139
  • LeftUpper4.jpg
    LeftUpper4.jpg
    330.5 KB · Views: 131
  • Rightfirst4.jpg
    Rightfirst4.jpg
    315.2 KB · Views: 110
  • RightSecond4.jpg
    RightSecond4.jpg
    223.7 KB · Views: 142
I was tryna decypha watcha wuh saiyin da hole tyme I waz reedin. It was tov:unsure:
But your project is still cool(y) keep up the good work and research
 
  • Love
Reactions: JPH
Perfect is the enemy of good.

In microincrements I am advancing the Line O Shine on the body and perfecting the head.

May even be knocking on tbe door of 40% accuracy! For the body and head, of course.

NOTE: the thingies that point down on the back of the head are at different angles.

Gonna burn up all my memory with this thread.
 

Attachments

  • 20230315_130302.jpg
    20230315_130302.jpg
    1,008.2 KB · Views: 121
  • 20230315_123923.jpg
    20230315_123923.jpg
    2.6 MB · Views: 149
And you may find yourself, sanding away at a little piece of green
And you may find yourself, checking for minor blemishes and dings
And you may find yourself, looking up "repetitive use tendonitis," online
And you might tell yourself, "when is *good* enough worth my time."
 

Attachments

  • 20230318_120244.jpg
    20230318_120244.jpg
    3 MB · Views: 131
I sanded down the inside of the Greens today. I will file down the grooves after I have the inside of the Greens nice and smooth and thin. I want to cast the greens out of transparent resin with some transparent green pigment. That way people can sorta see inside the chest piece. Maybe I will have a glowing tentacle in there.

Ohhh scary!


Also sculpted the first baby squid in the right side. I covered the body in plastic wrap and sculpted it. I will add details after it hardens.
 

Attachments

  • 20230322_214815.jpg
    20230322_214815.jpg
    2.3 MB · Views: 157
  • 20230322_214857.jpg
    20230322_214857.jpg
    1.8 MB · Views: 135
  • 20230322_134241.jpg
    20230322_134241.jpg
    2.4 MB · Views: 143
Side squids have rough sculpts and were successfully removed.
I would like an abrasive floss to sand down the sections, or I will have to use teeny files
 

Attachments

  • BothSquids.jpg
    BothSquids.jpg
    3.7 MB · Views: 117
  • LeftSquid.jpg
    LeftSquid.jpg
    1.9 MB · Views: 135
Let's just say, "these little side squids are taking some time."
 

Attachments

  • 20230406_165132.jpg
    20230406_165132.jpg
    3.7 MB · Views: 164
Yas, this project it still going. Just many udder tings goin on.

Squid sculpted and molded. Lots of refining the head and the body and the greens. I removed alot of extra crap and coated the inside in resin to stop it from being so resin dusty.

I made molds of the squids on the body, because the squids wrap around the body. Just plastic wrap in the body, then everything comes out easily if you have the patience to ssssllllllooooowwwwwlllly pull off.

Fighting with screen accurate vs symmetric vs Ohhh, I have an idea that seems pretty cool!

Bod223.jpg
 

Attachments

  • SquidRight.jpg
    SquidRight.jpg
    200.8 KB · Views: 133
  • SquidRebound.jpg
    SquidRebound.jpg
    276.1 KB · Views: 119
Made plugs/caps for the vents, then re-did the vent to look more legit.
Put a hole in it.

I don't want to pain the bottom of the vent black, I want to have little, glowy, alveoli-ish stuff. Prolly gonna make that from a kid's toy
 

Attachments

  • Plug.jpg
    Plug.jpg
    182.5 KB · Views: 96
  • PopOutPlug.jpg
    PopOutPlug.jpg
    161.1 KB · Views: 119
  • OutWifOld.jpg
    OutWifOld.jpg
    117.6 KB · Views: 105
  • Newscupltpnbase.jpg
    Newscupltpnbase.jpg
    141.2 KB · Views: 113
  • Ventwithahole.jpg
    Ventwithahole.jpg
    90.4 KB · Views: 96
  • ImjustaVent.jpg
    ImjustaVent.jpg
    115.7 KB · Views: 110
front vent/exhaust. I still need to file little wrinkles on the tip
 

Attachments

  • 20231021_193736.jpg
    20231021_193736.jpg
    550.1 KB · Views: 119
  • 20231021_193732.jpg
    20231021_193732.jpg
    1,017.3 KB · Views: 131
Allow me to vent

Sculpted vents onto the plugs/caps I made to fit the holes on the body.

A super light coat of XTC 3D so the Rebound 25 I use to make a mold doesn't pull off details.

Also, there are more than one set of Pauldrons, so picking the set I like and ssssllooowwwllly building to it.
 

Attachments

  • 20231105_194132.jpg
    20231105_194132.jpg
    792 KB · Views: 113
  • 20231105_194102.jpg
    20231105_194102.jpg
    960.7 KB · Views: 124
  • 20231105_194109.jpg
    20231105_194109.jpg
    1.2 MB · Views: 115
Workin' on the greens, I made a spacer template for the diatance between grooves.

I did not like....

So, I drew the grooved areas by hand, following the curves. 13 grooves. Trying to get that evenly-spaced illusion.

Next, dremeled the groove markings, followed by filing down those rough grooves.
 
Back
Top