JNordgren42
Sr Member
Looking fantastic! I actually kind of like the graininess on the deflector dish, it gives it a lot of character.
For the windows, have you tried UV cure clear resin? There is a green transparent tape you can get to cover the openings that the resin won't stick to. I you can put the tape over the exterior surface of the opening and get a perfectly flush result. And the UV cure resin gives you time to get in the opening with a needle and work any bubbles out. Also you can use a large gauge syringe needle for application that can help bubbles from forming in the first place. It's what I'm planning on using for my 350 Refit.
For the windows, have you tried UV cure clear resin? There is a green transparent tape you can get to cover the openings that the resin won't stick to. I you can put the tape over the exterior surface of the opening and get a perfectly flush result. And the UV cure resin gives you time to get in the opening with a needle and work any bubbles out. Also you can use a large gauge syringe needle for application that can help bubbles from forming in the first place. It's what I'm planning on using for my 350 Refit.
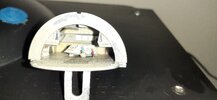
") ). My next test will be to try and put down a second layer of resin in the cavity after the first layer has cured. This should give it more bonding area and hopefully prevent them from popping out. I need to finish up my Valkyrie, then I'm digging back into the Big E.
). My next test will be to try and put down a second layer of resin in the cavity after the first layer has cured. This should give it more bonding area and hopefully prevent them from popping out. I need to finish up my Valkyrie, then I'm digging back into the Big E.