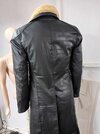
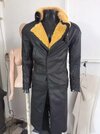
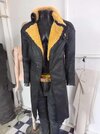
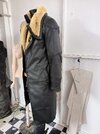
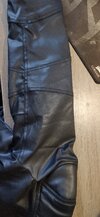
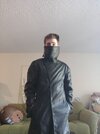
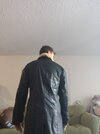
Ahhhh. I'll have to see what I'm working with when it comes in! I ordered this straight from Jameel at Excellent Leather Shop, he says it's the most up to date design.
Thanks for all the tips,
CountLau I'm also waiting on Jameel to ship my coat soon...
Really quickly, just so we can all benefit from your experience (and amazing results), regarding the
shearling distressing/dyeing...
Using the
BEP video tutorial/technique as a base guide, could you please provide us with your specific tweaks?
-
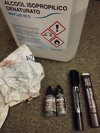
Colors: should we use the same dye colors as outlined in the BEP tutorial? Or are yours different? I believe you said you used 'mushroom' and 'gunpowder'. If so, can you tell us what proportions should we use of each one when mixing it with the alcohol? If you can post pics of the specific dyes, that would be great.
-
Permanent alcohol markers: I believe you used
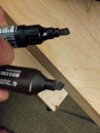
brown and black markers to actually apply on the shearling strands. Could you be kind enough to share what kind of markers you used and perhaps a photo of how you incorporated this into the distressing?
I think I can speak for all of us in saying that your shearling distressing is "one for the books" and something we all aspire to achieve.
Grazie mille!
Ah for you guys on the way for the final tweaks to have Jameel laminated twill coat to work on:
if you would decide there's a need to add magnets,for the magnets I added first of all I incapsulated them into vinyl using heat n bond (but also other methods may work fine) cutting couple pieces and stitching the magnets inside them before securing with ironing the edges,to have them ready to be sewed on those parts and with waterproof insulation (don't wanna the magnets to get rust never).
That was something I didn't specify to you pvt before,dunno if Jameel magnets are treated this way (didn't extract any,but maybe they are already secured from humidity maybe even with their own metallic coating),time will say if they will affect humidity and eventually lose effectiveness or not,definitely not so difficult to eventually replace them in the future (for me or a tailor)...but the ones I put,in any case I went on the safe side.
About my distressing technique...
I sent u pvt that vid (that one split into many parts,difficult to load and also rebuild I guess),as you've seen,my method is the same as in bep yt tuto in the first instance,but the colors ain't the ones they mixed trying differente rgb gradations: I used mushroom + gunmetal pigment (always ranger tim holtz). Then,the method in the vid I tried to show you,but it was me and if you're going for it, but I won't be there with you so really hope you will make it,as you've seen it consists in patiently hand working with a brown and also a little with a black permanent marker (always alcohol ink based). Endly,fading with isopropanol pushing with a rag avoiding any damage (gently and slowly,do not exceed with power),cleaning also the fur from excess pigment that could ever stain you later.
I haven't been too clinical with the proportions, but generally half and half, leaning more towards the mushroom cause mixative pigment (gunmetal) is stronger and shiny: the unneeded shine on the fur will fade away after working it with rag; alternatively I think also other mixed color as slate / rosewood might work well,playing with the mix eventually changing the one for the markers (for example to grey / dark green and fading them after altogether). It will be surely similar to my result in case you won't be able to find right now those exact colors I used,I think the difference to mine won't be remarkable and even add some personality but,I think those ones I used reached a pretty similar tonality to the movie one,but it will be matter of trying and gradually understand by yourself when you're reaching the right level...color too weak = go for something that will darken (black marker touches and even brown marker are way stronger than alcohol inks I used,but more difficult to spread all over the fur and risky to exagerate with the dark part) / too dark = wait for drying with thermic gun or dryer and don't wait for remove a little bit of pigment with rag and isopropanol (it will clean if used quickly in case of mistakes / exceeding of dark color),then try patiently and slowly,try again...till you reach the result you like.
For the markers,I don't think it must be the same brand as mine,but definitely alcohol based ink. I used them refining the job step by step,every time valuating if the result was enough or not,and filling the yellowish space left especially on the base of the fur (very long and patient work,every time repeating the fading with the isopropanol and rag and so on till the I liked the result to consider it the very final one).
Here the pic (of course you will also need the little sprayer,iron,baking paper,hairdryer or better (low temp set) thermic gun)

