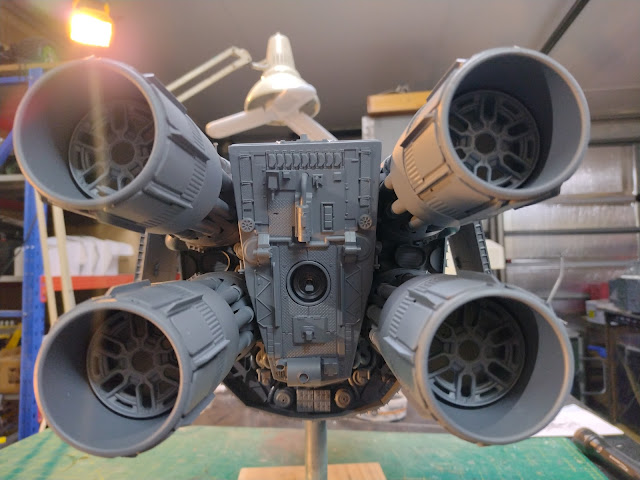
Next to tackle was the engines.
I gathered together a number of PVC plumbing parts into a pleasing arrangement and topped them off with the left over acrylic christmas themed wineglass ends cut from the engine bells of the
Heavy Salvage Tug project.
View attachment 1789205
View attachment 1789206
View attachment 1789207
One of the PVC reducers was machined in the mini lathe to extend the conical section which becomes the front of the engine.
The piece I cut off was machined to fit inside another piece of tube to locate the difference in diameters between the PVC vent cap and the front reducer.
I like to have a mechanical fit for strength rather than to rely on glued butt joints.
The rear PVC Reducer holds the LED downlights I am using for the engine lights.
I machined a small lip in the end so the lights can be located in them and secured with a few drops of superglue.
View attachment 1789208
View attachment 1789209
The engines were test fitted to get an idea of how they might look.
They turned out slightly longer than the cylinders in the low poly model but proportionally I think they will be fine.
View attachment 1789210
View attachment 1789211
To maintain the cylindrical nature of the engines in the thumbnail I added pipes coming out of the slots in the PVC vent and terminating on the 45 degree angle of the PVC reducer next in line.
The 8mm solid ABS rod was cut to length and then the angled cut made on the mini chop saw.
View attachment 1789212
View attachment 1789213
View attachment 1789214
The other end of the pipe needed a short flat cut into it to fit between the vent cap and an inner PVC tube.
This was done on the drill press using a small dremel saw disc.
A scrap wood jig was made to hold the angled end of the ABS rod in the correct orientation for machining of the flats.
Two passes had to be made in each of the 40 rods to achieve the required depth of cut.
View attachment 1789215
View attachment 1789216
View attachment 1789217
I then added a small length of tube to each pipe which helped to centre it correctly in the slots and gave it a bit more interest.
There will be more engine detailing to come.
View attachment 1789218
View attachment 1789219
View attachment 1789220
The engines were glued into position and the wiring finalised then tested.
View attachment 1789221
View attachment 1789222
View attachment 1789223
A start has been made on detailing the engine nozzles.
Behind the nozzle is another scrap wood jig to hold the t section evergreen strips vertically and a series of marked lines to align to for the next two strips. The black panels are 1mm styrene sheet with some evergreen textured sheet under them.
View attachment 1789224
Thanks for looking.
More soon...


