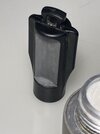
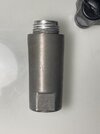
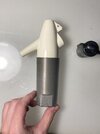
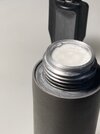
Agreed about the photo quality, but the existence of a taller knob with tighter knurling that is a known part used by the prop makers leads me to believe it's likely the sweep arm counterweight.
-
Welcome to the Project Runs Forum!
This forum is intended for interest gauging and active runs. Due to the transient nature of this forum, please keep all research and ongoing discussion in one of our main forums so your information is not lost.
Only Premium Members can start a new run.
You are using an out of date browser. It may not display this or other websites correctly.
You should upgrade or use an alternative browser.
You should upgrade or use an alternative browser.
Limited Run Mynock Cave Dagobah Oxygen Tank
- Thread starter thd9791
- Start date
Agreed about the photo quality, but the existence of a taller knob with tighter knurling that is a known part used by the prop makers leads me to believe it's likely the sweep arm counterweight.
Could be. I think “skinnier” may be correct on that detail piece.
Yeah - I can only tell that it has texture, a beveled rim and the probable diameter! I do have a little "deal" happening where I'll own and be able to mold the sweep arm counterweight, because it does really look the part. The Canadian postal service is on strike so.. kinda on the fence about mailing stuff now or waiting.
Maybe we can hit it with rub n buff, I've had good experience getting that really shiny, way more than spray paint. Or you guys can do it yourself, it is a kit after all
I'm very excited, the bottle I got for the threaded mouth is an older one as well. The angles on the silver cap are much sharper, I get the feeling they streamlined the molds as the years went by to look "newer" so there might be some tiny details that are different in the plastic top. I think I already mentioned it but I lathed a custom PVC insert for the valve to the exact depth (where the plastic top sits) and it fits like a glove. It took like 2-3 hours but it's going to make molding it much more reliable.
Option 2 please
I got enough deposits to cover most of the materials and decided to pull the trigger. I opted for high detail resin rather than the high impact stuff, it’s harder for air to escape with that stuff and I really want to get the best casts
If I’ve missed marking you down let me know, I’m going to go through my PayPal history later today
Exciting!
Alright folks, the cartridge mold is finishing curing today. I nailed the valve on the first try, and did a test pull with some leftover resin from like last year. Came out great, except when it’s that old there is usually moisture contamination which makes it balloon up like some alien creation - it’s kinda wild to watch, anyway, it was a mold pre-test and the mold is great!
Little teaser for everyone. I’d say the cartridge mold is perfect. Do y’all want them cut to the tank’s length or the whole cast?
The valves are incredible, they thread right into a sparklets top and the only bubbles are on the bottom face where the red washer goes.
And for some reason EaseRelease spray did not work. I had these beautiful dots and wavy lines to key each half together lol no worries, these jagged cuts work just as well as keys!


I’m making a second Valve mold because I want to see if I can erase these dimples that are from the silicone mold, not casting. Will follow up with that result-


The valves are incredible, they thread right into a sparklets top and the only bubbles are on the bottom face where the red washer goes.
And for some reason EaseRelease spray did not work. I had these beautiful dots and wavy lines to key each half together lol no worries, these jagged cuts work just as well as keys!
I’m making a second Valve mold because I want to see if I can erase these dimples that are from the silicone mold, not casting. Will follow up with that result-
Super exciting. Thanks for putting in the time ad effort to do these right, Tom!
Welp, there's a lesson for everything.
Don't be alarmed, I ordered a fresh 8 pounds of resin this morning. Apparently you want Polyethylene cups when you mix polyurethane resin. Red solo cups are polystyrene and will dissolve. I switched disposable cups at some point, and learned my lesson. I think I contaminated the end of my resin somehow. washed my molds and I'll just do the rest with fresh chemicals.
Let's all thank teecrooz for sending me his counterweight to mold! Should be here next week.
Similar threads
- Replies
- 5
- Views
- 617
- Replies
- 75
- Views
- 5,966
- Replies
- 2
- Views
- 351
- Replies
- 4
- Views
- 1,404
- Replies
- 6
- Views
- 1,050


