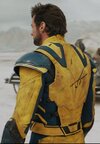
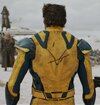
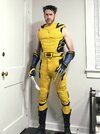
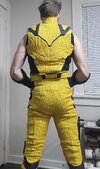
My Wolverine costume build - yellow suit from Deadpool & Wolverine

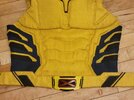
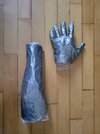
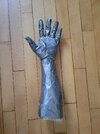
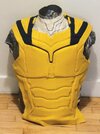
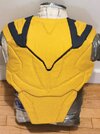
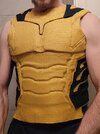
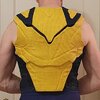
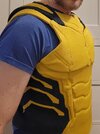
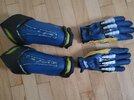
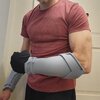
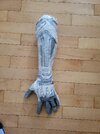
Abs added. The pecs and abs are only tacked together at the middle (I still need to keep it free to sew the side pieces onto the abs). I plan on adding a little foam to the back of the pecs to round them out a bit more, but I'm liking how it looks. Just adding the abs has gotten me a lot more excited about finishing this - I still have a lot to do, but I'm feeling more like I can get it all done in time. I did buy some "off the rack" gloves in case I can't make some from scratch (either due to time constraints and/or my sewing ability). I also made a duct tape forearm and hand to help with making the gauntlets and gloves.

20241005_012702.jpg


20240926_125735.jpg20240926_125727.jpg
 
Last edited:
This is really coming together! I’m guessing you aren’t gonna have much room to bend over with the foam abs?
Thanks! The foam is thin, and it flexes enough that it should be okay to move around some, but I've have to check once I try it on. The top will also have straps holding the front and back together (like the original), so I think that allows for more movement as well.
 
Thanks TimDRX. I do wish the fabric had more stretch to it (and would shred less when cut), but having the textured look is worth it.

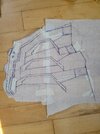
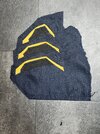
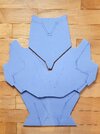
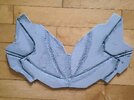
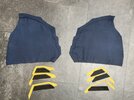
Small-ish update (though it took me longer to do than expected), I finished one side of the fabric portion of the top. Here's the initial layout, and the finished product:

20241005_133405.jpg20241006_193805.jpg

I'm not 100% if I got the actual shapes all correct, since I couldn't find much good reference for the area directly under the arms, but it should be close. And, as the 'Tested' video mentions, they had to keep adjusting the positioning of the shapes based on changes to Hugh Jackmans muscularture, so my own costume also needs similar adjustments which will make it unique to my body. So it'll never be 100% accurate, even though that was never the goal.

My construction is a little off, not as crisp in spots due to how I laid it out, but it should be alright. I figured out sone things that should make the other side go easier - I found I could omit some pieces by combining them. I alao didn't sew all of it, just a couple spots, instead opting to use Heat N Bond and hot glue, which should still hold well.

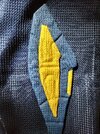
I also decided I'm going to paint all the blue fabric on the costume - it was a little too dark, especially in lower light and warm light settings, where it looked almost black. Here's a pic after painting the shoulder pads, in bright sunlight, laying on top of the unpainted navy fabric for comparison:

20241006_133929.jpg
 
Nearly done with 3D modeling the buckle, I still need to add a slight curve and make sure everything is watertight:


Buckle 1.png
 
  • Like
Reactions: JPH
New render of the buckle with adjustments. It's not apparent in my last post, but some of the depths needed adjusting. I also did a test print of the old version, which I made with a 15 degree curve, but it wasn't enough. So I upped the curve in the new version to 25 degrees. I chopped down the sides to better accommodate where they'll attach to the belt (which will be foam).

Buckle 2.png


Previous version test printed in pla, about 62 mm H × 160mm W:

20241009_145708.jpg
 
Still lots more to do, but it feels good getting the foam parts of the top finished. I initially made a couple mistakes with the back piece - first, I forgot to add the muscle shapes in the foam before wrapping it with fabric, and second, I cut my fabric the wrong direction, so the pattern was running sideways instead of vertically. It may not be apparent, but the diamond/square pattern of my fabric isn't actually square, but slightly longer vertically than horizontally. It wasn't too noticeable, but since I forgot the muscle shaping as well, I removed the fabric and redid it.

20241010_233908.jpg20241011_150248.jpg20241012_012534.jpg20241012_012236.jpg20241012_012751.jpg20241012_012945.jpg

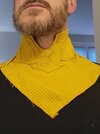
The neck hole has enough room that I can get it on and off without needing a zipper of some kind of fasteners. I haven't made the undershirt yet, which will have the rest of the yellow collar (which will need a zipper, which I believe is covered by that center panel on the screen-used costumes).

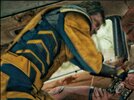
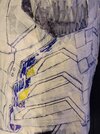
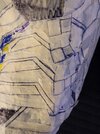
I also need to remake the side fabric panels of the top. After finishing one side, and comparing it to new screenshots from the 4K UHD streaming release of the film, I realized it wasn't right - the yellow stripes were too small and the spots where the straps attach were the wrong shape. I hate that I wasted time, but I'd rather get it right if I can, especially since I didn't make the other side yet. The new pics also show the buckle that attaches to the straps. You can also see the black fabric areas better in these pic - there are stripes that run under the yellow pads on the lower back area. I lightened and enhanced the screenshots to highlight the details.

Screenshot 2024-10-10 130926-01.jpegDeadpool and Wolverine 2024 2160p WEB-DL DDP5 1 Atmos DV HDR H 265-FLUX.mkv_snapshot_00.41.28...jpegDeadpool and Wolverine 2024 2160p WEB-DL DDP5 1 Atmos DV HDR H 265-FLUX.mkv_snapshot_00.41.30...jpeg

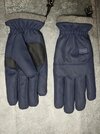
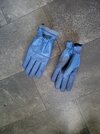
I also bought these gloves on Amazon, I think they were $5. I bought them partly in case I couldn't make gloves - which is probably going to be pretty hard at this point, given the fabric limitations and my sewing limitations, but also because they can be used to operate touchscreens, and I figured I'd like to be able to use my phone without having to take my gloves off. I'll still alter them to look more like the costume gloves, but it'll still be a time saver. They're winter gloves, so they might be a little thick, so I might try to remove the inner lining.

20241012_013218.jpg

My to-do list:
  • Finish the side panels for the top
  • Make the undershirt neck collar and shoulder areas (ripped sleeves)
  • Make belt (3D printed buckle and fabric wrapped foam)
  • Make the boots (faux leather over existing shoes)
  • Make the gauntlets (foam)
  • Alter/make gloves, including 3D modeling & printing the back of hand and metal claw sheaths
  • Weather/detail costume (paint)
  • 3D print claws (from existing file found online)
And if I finish all that in time:
  • Make claws retractable (altering existing 3D files found online)
  • Make mask (foam + fabric + mesh eye lenses)
  • Make pauldrons (shoulder pads)
Not sure I'll get it all done, but I've got a couple weeks left and the biggest parts of the costume are mostly complete.
 
Last edited:
Side panels redone and attached:
20241016_002554.jpg
20241016_012320.jpg

20241016_012143.jpg20241016_012725.jpg20241016_002607.jpg

Progress pics of the panels:
20241014_012141.jpg20241014_012151.jpg20241014_234223.jpg

To save time, as well as have the stripes look sharper, I didn't sew or fold over the fabric like I did before (except on the blue edge details), instead opting to use a single layer of fabric with Heat N Bond Ultrahold double-sided iron-on adhesive. It's not as accurate, but a lot faster. I pre-painted the blue panels, which turned out to cause a little problem later when I tried to iron on the stripes - the iron picked up the blue paint and spread it to the yellow fabric. I was able to remove most of the paint so it's not too noticeable. I figured I'll be weathering the whole costume anyway. For the other panel, I used paper in between the iron and the fabric to avoid the problem.

Instead of using nylon straps and buckles, I decided to just use elastic to attach the back to the sides, mainly because I wasn't sure I'd be able to attach the buckles without any help, as well as being quicker to make - I'm feeling the time crunch, so I'm trying to take a few shortcuts. If I have extra time layer, I can always revist things and improve them. The elastic straps work alright, though getting in and out is a little cumbersome.

The shoulder pads areas could have more height, but I was worried about making the costume too padded - too much padding would look disproportionate to my physique and end up looking unnatural. I did add a litle foam from an old mattress pad to the inside of the pecs (as I mentioned before) to round them out a bit more.

The top seems a little short, but once the belt is attached, it should look alright.

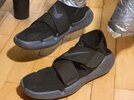
I haven't started on the boots yet, but here's the shoes I'm using:

20241016_013525.jpg

They're a pair of Nike Free Run shoes I already had. The real costume boots were entirely specially made, so I don't think there are any shoes out there that match the soles. I think these will work pretty well and be a good base for the boots. Since the uppers are a stretchy fabric, I should be able to add fake leather to them pretty easily.
 
Wow that looks so good!

I meant to say earlier: the shower curtain??? Genius. Pure genius.

I always like elastic in place of nylon straps. Keeps everything in place without the need for buckles and how to hide them. I have used elastic and Velcro so it can be adjustable and helps with the on/ off you talked about.

Lastly l do think the top “appears” short but that’s good because it does on screen too. IMO it has a short torso / high waist look. And your right, the the belt will pull it all together.

I can’t wait to see it all.

EPIC.
 
Still working as hard as I can trying to make my deadline for this coming weekend, so I haven't had much time to post. Here's some uncompleted pieces, though.

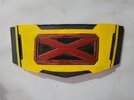
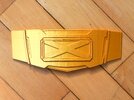
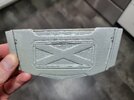
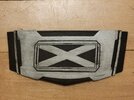
Reprinted the buckle. It's not done, but gives you an idea. I tried painting it silver first, then used red Sharpie for a red anodized metal appearancefor the "X," but I realized it didn't really need to look anodized - it just needs some shiny, metallic red. I may repaint it if I have time, otherwise I'll touch up what I've got:
20241018_191352.jpg20241020_191041.jpg20241022_125027.jpg
The belt is close to completion:
20241023_000858.jpg

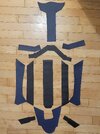
Boots are well on their way. Here's most of the pieces needed - I forgot a few, but you get the gist:
20241021_202839.jpg
I was going to do it right and sew everything, but time's a factor, and I wasn't confident that I'd sew it without errors. I hot-glued most of it instead, though the fake leather surface is too smooth, so glue has a hatder time sticking to it. The back is fine for glue, since it's more fabric-like. For the second shoe, I started supergluing the parts that wouldn't take the hot glue, which seems to be working. I had also tried e6000 plus (which is their odor free version) but it also didn't stick well - part of it is probably that there's now a lot of hot glue coating the surfaces, which also doesn't adhere to other glues well.
I'll be cleaning up all the extra hot glue - I kept using more and more to try to get to slick fake leather to glue together. Luckily, the hot glue is easy to peel off the fake leather. But I sure wish I had realized sooner (the second boot is a lot cleaner):
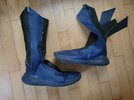
20241022_124143.jpg20241022_233244.jpg

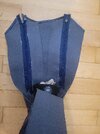
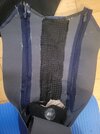
Still need to add all the straps and buckles. I used two invisible zippers along each side - I was only planning on using one (along the inside leg of each boot) like the movie boots, but I needed two in order to get my feet in and out. I'm debating on moving the zippers down more toward the soles. It's either that, or add velcro to the sides at the bottom so I can get my feet in and out without splitting any seams.

Before I glued the front on, I hot-glued fabric to the back (interior) of the pieces that were super glued together, to hopefully add stength to the seams:
20241022_230316.jpg20241022_230857.jpg

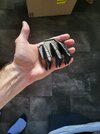
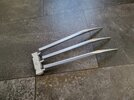
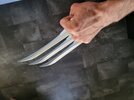
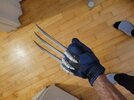
I also ended up ordering some Wolverine claws off of Amazon - I know I could've 3D printed them myself, but the time it would've taken to sand them and paint them could be put to better use working on the other costume pieces. I'll post pics later - they need some adjustments to fit my hands better, plus, I'm still working on getting the backs of the gloves and the sheaths made.
 
Last edited:
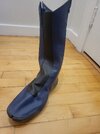
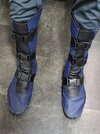
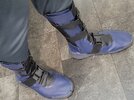
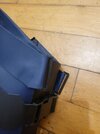
Quick pics of one of the boots (color looks a little off due to low light, but the blue is the same at the top and the bottom). Still needs some glue cleanup and re-gluing on a couple spots (you cab see the center, black piece towards to toe needs resetting), plus I was waiting for the buckles for the top straps to finish being 3D printed, but both boots are pretty much done otherwise. I did lower the zippers on both sides because I kept breaking the seams by the ankle when I tried to put them on and take them off, since the boots are pretty form fitting. I tested them out, and the good news is the glue holds well and I have good mobility. And they're actually pretty comfortable. I used the fake leather throughout instead of using fabric since it's not only more accurate, but the boots needed more structure. I omitted some details (like the extra pieces on the front, black section), but I'll add them in, eventually. Just trying to make sure I get all the main pieces done before the weekend before doing anything extra.
20241023_235554.jpg
20241023_235602.jpg


I also printed more rivets and test printed one of the metal sheathes on the gloves that house the claws. I printed them before going to bed last nigh and didn't have time to check them before work, so I'll get to them later.
 
Last edited:
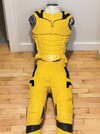
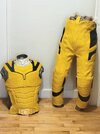
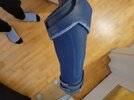
Boots completed. They still could use some detailing (maybe some weathering), but they're structurally complete, so I've moved on to other things. They look skinny, but that's because they were made for my body type. They should look good with the pants - I couldn't try them on together for this pic because I just painted the blue areas on the pants and they're drying.

20241024_212703.jpg

20241024_212806.jpg20241024_213040.jpg

Not a great pic, but here's the buckle I modeled and 3D printed for the top straps:
20241024_205951.jpg
 
Last edited:
Well, it's done!

1000014844.png
1730145321498.png
snapseed-03.jpeg
1730141418038-01.jpeg


I managed to finish by Saturday night - I got lots of compliments - but I had some problems that made me have to slap a few things together just to get it finished. For one, my 3D modeled claw sheathes didn't work - they look alright, but they weren't flexible and didn't line up with the claws, which is more an issue with the claws than my model. The claws I bought on Amazon are good, except they don't fit me quite right - I don't have "webbed hands," persay, but I guess the area in between my fingers is longer than average, so the claws don't go high enough, toward my knuckles, like they should. So if I put the sheathes in the correct position on the gloves, the claws don't connect. I ended up making new sheathes out of foam, so they'd flex a bit. And since I was running out of time, I just slapped black duct tape on the back of the gloves abd crudely hot-glued the yellow fabric on. I previously had lightly painted the gloves with the blue spray paint so they'd match the gauntlets, but I ended up repainting the gauntlets darker, so I removed some of the paint on the gloves. I kept the palms and fingers less painted so the gloves would still work with touchscreen devices.

20241026_123956.jpg20241026_102048.jpg20241026_102024.jpg20241026_124038.jpg20241026_151331.jpg20241026_185628.jpg20241028_153414.jpg20241026_173610.jpg20241025_171317.jpg20241025_095939.jpg
I also neglected to carve in some of the detail in the gauntlets begore painting, so I just painted them in (again, due to time constraints). Not great looking by any means. I ended up taking them off for most of the night anyway, since they didn't look great or fit well. I had planned to use invisible zippers to close them, but I used the ones I bought on the boots instead (since I had to use 2 for each boot instead of 1 as planned) and didn't have time to get extras. They're also hot to wear, since the foam doesnt breathe. I plan on redoing them this week, using thinner foam (6mm was too thick), and/or possibly printing new parts with flexible TPU filiment, which I ordered.
 
Last edited:
More on the build - I added some extra material to the inner collar so my black undershirt wouldn't accidentally show. The back has an invisible zipper under a flap held by velcro:

20241026_171812.jpg20241028_184227.jpg20241026_121915.jpg

I didn't attatch the neck to the undershirt - I thought it was staying in place well enough, but later I realized the back of the neck was turned. I'll affix it to the black shirt.

I took some pics after I got home, so the costume is a little rumpled. The pants needed to be pulled up more (I had suspenders on, but they needed tightening) and the top needs to come down. I had added foam to the shoulder/trapezius areas which helped the look of the shoulders, but also pulled the waist further up. I'm going to adjust that, as well as lengthen the straps going front to back if I can.

I also couldn't decide on how to attach the belt so I could still get the top on and off, so I ended up gluing myself into it. I glued the buckle to the shirt but I misjudged the length of the waistband of the belt, so the belt doesn't connect to the buckle. An easy fix, plus I'll add some kind of strap or belt to the back so I don't need to glue myself into it. The back of the belt was also a last minute rush job - I had made the piece, but hadn't added the black details. I just sloppily painted it, so that's another area I'll be fixing.
20241027_024444.jpg20241027_024459.jpg
1000014882.jpg
 
Last edited:
Back
Top