DPCA Vader. Restoration and upgrade

I never did have much success reshaping the neck. I tried using a heat gun, but you've got to be careful because the plastic gets soft really fast. When I tried to decrease the neck flare, I had a hard time getting it to bend in the shape that I wanted. In the end, it didn't look a whole lot different.
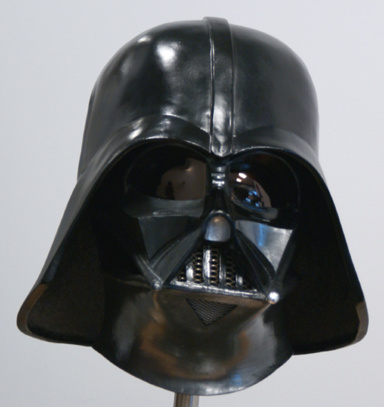
The neck was wonky, I hate to admit I tried to trim my down to even it out before I eventually sold the CA.

For its time, for what it was, the DP CA was a great budget Vader ESB derived bucket.
Of course, the later PCR ANH Vader exceeds it for its original price point, but still...
 
OK I know it’s been forever, but I need input on this neck flair. My intuition tells me to trim it to a closer match. I started sanding him down, kinda a rough material to work with. I have metal tusks,accurate screens and plan on doing the 2 tone paint….that neck though
 

Attachments

  • IMG_1846.jpeg
    IMG_1846.jpeg
    746.3 KB · Views: 107
So before I trimmed the neck I gave it the old heat,bend/cold water treatment and good thing I did as I would have trimmed to much if I hadn’t. After I got the neck I hit the jawline as one curved out and the other in, so I pushed his left side outward. It looks 100% better I think though it cannot be symmetrical as the whole thing is wonky and is supposed to be. I had to try the tusks and lenses to get some motivation as the sanding is going to be a real chore. Please lmk what you guys think.
 

Attachments

  • IMG_1847.jpeg
    IMG_1847.jpeg
    642.3 KB · Views: 109
  • IMG_1848.jpeg
    IMG_1848.jpeg
    1.1 MB · Views: 110
So slight tragedy. Things were going so well I decided I would put in the lenses as a test showed that some wrangling needed to be done and better to mask the lenses than mar paint. Well I broke them, lol. Oredered another set and this time the mask will get heated until soft for installatio. Live and learn. And pay
 
Last edited:
Just came back to this thread. Sorry to hear about the lenses.

Not sure I understand why you are talking about trimming the neck. I was under the impression the DPCA neck was already shorter than it should be. The flair has to be treated by heating it up and pushing it into position and then finding a way of strengthening it from the back, so it does not go back into the flared look. If this is for display I would suggest gluing something rigid into the back that has the correct shape the neck has to be, so it will never move again.

And why do you need to sand it? It's vinyl. It does not sand well.
Thanks
, I should have new lenses in hand in a week or two. Looking at reference, it seems to me that the neck flairs out a little at the bottom,just a little. On mine, the left side (masks left) flairs a little and the right was straight and went much further down. If it should be straight, that would be easy to do as well. It has to be sanded as it has been clear coated and it is chipping. It’s not ‘easy’ but it is sanding. If I dont sand the dome, the paint will look terrible
 
Since this is vinyl, it should be easier to strip it rather than sand it.

The neck on the left side (right in pictures) flares out too much. Right side (left in pictures) seems about right. The main flare in many DP helmets, even the fiberglass ones, were always usually that left side.

Don't mind the neck extension on this casting. It was the best I could find that shows the shape of the neck from a roughly straight on shot.

Vader - TM - 017.jpg
 
Since this is vinyl, it should be easier to strip it rather than sand it.

The neck on the left side (right in pictures) flares out too much. Right side (left in pictures) seems about right. The main flare in many DP helmets, even the fiberglass ones, were always usually that left side.

Don't mind the neck extension on this casting. It was the best I could find that shows the shape of the neck from a roughly straight on shot.

View attachment 1779988
Cool thanks, easy fix which is sad because I like the flair lol. What would you suggest to strip it without harming the viny?
 
Well, you need something in gel form, as more watery stuff won't stick on the surface long enough to effect the paint evenly. Though, I believe you can do it with most paint thinners, acetone, turpentine pouring it out on a round cotton piece you use to wipe off make-up. I tried brake fluid (not brake cleaner), but it had the problem of just running off too quickly - maybe I should have tried the cotton piece trick. There is also degreasers, but I cannot remember what it is called now... Green Stuff or something. Though, for that you would have to soak it in it for a while.
 
It would probably be worth reaching out to dcarty here on the forum, as he's restored a few Don Post helmets - though I believe those were the fiberglass ones.

 
So after re ordering the same lenses as before from the Etsy maker, I got the correct color (so though he said he sent the proper ones previously they weren’t ) they were smaller than the originals he sold me so I decided to go whole hog and oinstall from the inside and I ordered fro Felix props. They showed up in about 6 days so I trimmed the lip from the eyes. Snapped a chunk out, but as it’s vinyl it fit perfectly back in with some cyano. I then backed that and filled the tiny missing spot with some epoxy putty. I sanded the whole face down and then wiped it with alcohol. Some parts still feel tacky. I am going to spray it with some automotive plastic adhesion promoter before primer coat with some build/primer for the small scratches and imperfections from the trimming or original sculpt around the vents. I know it was cut pretty rough in the original film, but I am not reproducing the prop but making a Darth Vader helmet. Dome also needs to be sanded down as it is all orange peely. Hopefully I get it primed this week.
 

Attachments

  • IMG_1971.jpeg
    IMG_1971.jpeg
    942 KB · Views: 58
Back
Top