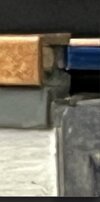
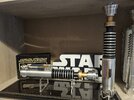
Interest DaveP's 40th Anniversary Luke Hero (Interest Thread)

Do you plan to release the neck weathering stencils that you use on finished commissions?
Originally, I was doing this by hand/eye, but I have actually made up a stencil now for consistency and to save time. I can include this with DIY kits going forward. Not a problem. (y)

And if anyone wanted one for earlier DIY kits, please just get in touch, and I can get one to you.

As I've mentioned regarding the rails. If any previous customers are concerned about their earlier commissions or kits now being out of date, I'll do everything I can to get the updated parts out to you.

This is such a recent development and wasn't a decision that I took lightly.

The last thing I want is to cause any disappointment and will do what I can as soon as I have the new rails in hand. (y)

....

A huge thank you to everyone who has placed an order for March. I can obviously be working on these prior to the rails arriving and will get anything that doesn't require them out to you ASAP.

Just a quick heads up for anyone who wanted a V1 Hero commission but found that they had gone "out of stock" straight away.

This is because I only added very limited stock of everything for this month.

Fully finished commissions always seem to sell out immediately.

As I only sold a couple of DIY kits this time around though, I've moved things around and de-listed these. This has allowed me to list a couple more V1 commissions for anyone who missed out. (y)

Still a very limited number, but having such a small number of DIY kits to prepare will allow for a couple more commissions this month.

So, V1 Hero commissions should be showing as back in stock for the moment.

Thanks again everyone!

All the best,

Dave
 
Last edited:
Hi Dave, are you still planning to add some instructions for those of us who have purchased DIY kits? It's mainly the board really.
Fantastic work you're doing Dave, really looking forward to receiving my kit.
Thanks.
 
Just got my ISYHCANL in from across the pond today! What a gorgeous hilt, I think anyone whose bought from DP before can attest to the craftsmanship these hilts have. Really pleased to have this alongside an older Hero of his I picked up second hand, and painted myself. Of course, my skills are nothing compared to this new hilt. Perfection from top to bottom, no expense spared. Stunning replica!
Thank you again Dave for all you do for the lightsaber prop community!
 

Attachments

  • 20240308_183804.jpg
    20240308_183804.jpg
    3.6 MB · Views: 155
**UPDATE**

Hello everyone.

Just a very brief update if it’s ok...

Just to confirm that the new rails for the V1 Heroes arrived yesterday via FedEx! The correct size this time!

I now have everything needed to get the last remaining orders from February out to everyone, as well as all orders from this month too.

If you could just bear with me whilst I get the rails installed on to February’s commissions, I’ll get these on their way as soon as possible. (y)

I had a chance yesterday to get an example put together and I’m very happy with the proportions this time. It’s a very subtle difference between the previous example, but hopefully you’ll agree that it was worth the additional wait for the correct size, and now that I have one made up there’s just no doubt that the profiles I ordered originally were definitely a size too big. Apologies again for the delay that this caused.

Here’s a finished (on-set) control box with the new rails:

01.jpg

03.jpg

02.jpg

04.jpg

05.jpg


As well as the above example, I’ve cut all the rails I need to length (roughly):

06.jpg


I have also now added the new rails to any outstanding DIY kits from February.

I’ll be packaging these up this evening and sending them on their way tomorrow. Expect to receive tracking details for these later today!

I have also been busy working on March’s orders too and I’m happy to say that ALL small (non-hilt) orders are now ready to leave tomorrow too. This includes any DIY control box kits and Reveal boards.

For those who have asked, I have FINALLY put together a tutorial for the reveal boards! I’m so very sorry for the delay in getting this published. With everything that’s been happening, and all of the physical work, it’s been difficult to break away and spend time at the computer.

12 copy.jpg


Here it is though for those who need it: V1 Reveal Board Tutorial

It’s maybe a little brief and expects you to refer to the images for positioning of each individual piece, but if you have any questions or would like me to expand on anything, please do get in touch.

I’ll be posting a similar tutorial for my DIY hilt kits soon!

For now though, I’m going to crack on with getting orders completed and on their way to their new homes.

I must prioritise February’s orders if that’s ok, but as I said, DIY kits are done and ready to be packaged up and sent out.

Based on the example control box I have already put together, I don’t foresee that it will be long before finished commissions are on their way too. Hopefully by the end of this week. :)

This will then leave two weeks of March remaining in which to focus on the small number of fully finished commissions I took on for this month. I have already made a start on preparing the parts for these by the way and expect to get all painting done early next week (week three) leaving week four for assembly and weathering.

Regarding fully finished commissions; I have had a couple of people drop out after placing orders this month unfortunately. As they had already been accounted for in my schedule, and have already been started, I added these back on to the store earlier today for anyone wishing to jump on to March’s commissions. These will be finished by the end of the month as planned. (y)

I’m going to drop off the radar for now whilst I work my way through what needs to be done!

Please do get in touch though, if you have any questions regarding anything I’ve mentioned.

Thanks again for your support (and patience!) everyone!

All the best and MTFBWY,

Dave
 
**UPDATE**

Hello everyone.

Just a very brief update if it’s ok...

Just to confirm that the new rails for the V1 Heroes arrived yesterday via FedEx! The correct size this time!

I now have everything needed to get the last remaining orders from February out to everyone, as well as all orders from this month too.

If you could just bear with me whilst I get the rails installed on to February’s commissions, I’ll get these on their way as soon as possible. (y)

I had a chance yesterday to get an example put together and I’m very happy with the proportions this time. It’s a very subtle difference between the previous example, but hopefully you’ll agree that it was worth the additional wait for the correct size, and now that I have one made up there’s just no doubt that the profiles I ordered originally were definitely a size too big. Apologies again for the delay that this caused.

Here’s a finished (on-set) control box with the new rails:

View attachment 1799199
View attachment 1799201
View attachment 1799200
View attachment 1799202
View attachment 1799203

As well as the above example, I’ve cut all the rails I need to length (roughly):

View attachment 1799204

I have also now added the new rails to any outstanding DIY kits from February.

I’ll be packaging these up this evening and sending them on their way tomorrow. Expect to receive tracking details for these later today!

I have also been busy working on March’s orders too and I’m happy to say that ALL small (non-hilt) orders are now ready to leave tomorrow too. This includes any DIY control box kits and Reveal boards.

For those who have asked, I have FINALLY put together a tutorial for the reveal boards! I’m so very sorry for the delay in getting this published. With everything that’s been happening, and all of the physical work, it’s been difficult to break away and spend time at the computer.

View attachment 1799205

Here it is though for those who need it: V1 Reveal Board Tutorial

It’s maybe a little brief and expects you to refer to the images for positioning of each individual piece, but if you have any questions or would like me to expand on anything, please do get in touch.

I’ll be posting a similar tutorial for my DIY hilt kits soon!

For now though, I’m going to crack on with getting orders completed and on their way to their new homes.

I must prioritise February’s orders if that’s ok, but as I said, DIY kits are done and ready to be packaged up and sent out.

Based on the example control box I have already put together, I don’t foresee that it will be long before finished commissions are on their way too. Hopefully by the end of this week. :)

This will then leave two weeks of March remaining in which to focus on the small number of fully finished commissions I took on for this month. I have already made a start on preparing the parts for these by the way and expect to get all painting done early next week (week three) leaving week four for assembly and weathering.

Regarding fully finished commissions; I have had a couple of people drop out after placing orders this month unfortunately. As they had already been accounted for in my schedule, and have already been started, I added these back on to the store earlier today for anyone wishing to jump on to March’s commissions. These will be finished by the end of the month as planned. (y)

I’m going to drop off the radar for now whilst I work my way through what needs to be done!

Please do get in touch though, if you have any questions regarding anything I’ve mentioned.

Thanks again for your support (and patience!) everyone!

All the best and MTFBWY,

Dave
great job I don't have everything figured out about the shipping dates but I think soon and isn't there normally a filling at the level of the "T" towards the copper rail? balsa it seems to me, no?

Thanks Dave
 
great job I don't have everything figured out about the shipping dates but I think soon and isn't there normally a filling at the level of the "T" towards the copper rail? balsa it seems to me, no?

Thanks Dave
I was thinking the same thing about the filler in the T tracks.

Maybe this exemple was just a quick assemble to show us the new T tracks without finishing the controle box at 100%.
 
great job I don't have everything figured out about the shipping dates but I think soon and isn't there normally a filling at the level of the "T" towards the copper rail? balsa it seems to me, no?

Thanks Dave

I was thinking the same thing about the filler in the T tracks.

Maybe this exemple was just a quick assemble to show us the new T tracks without finishing the controle box at 100%.

There is definitely a light "substance" that can be seen in the gap. Is it a wooden filler though? Or is it the adhesive that was used?

Would they have gone to the trouble of sanding two strips of wood down to 0.8mm X 1.6mm?

Having put the above example together, I can say that it wasn't necessary.

Why would they not have used a piece of the same ABS profile if that's what they were doing? The upright in the T is the perfect size, and could have been made flush/neat at the ends.

Whatever's in there doesn't reach the end of each rail.

Personally, I think that what we're seeing in that gap is the adhesive.
 
Je pensais la même chose à propos du produit de remplissage dans les voies en T.

Peut-être que cet exemple était juste un assemblage rapide pour nous montrer les nouvelles pistes T sans finir la boîte de contrôle à 100 %.
peut-être, mais sur beaucoup de références, nous voyons qu'il n'est pas vide ici par exemple
IMG_2323.jpeg
 
There is definitely a light "substance" that can be seen in the gap. Is it a wooden filler though? Or is it the adhesive that was used?

Would they have gone to the trouble of sanding two strips of wood down to 0.8mm X 1.6mm?

Having put the above example together, I can say that it wasn't necessary.

Why would they not have used a piece of the same ABS profile if that's what they were doing? The upright in the T is the perfect size, and could have been made flush/neat at the ends.

Whatever's in there doesn't reach the end of each rail.

Personally, I think that what we're seeing in that gap is the adhesive.
after that I don't judge your work dave! It’s already huge what you’ve done and found as a reference! I just had to go through all the references available (many are vague enough for us to have something certain!) and after all, even if in the future we are certain of this detail it would not be difficult to add this element ourselves
 
Sorry for the delayed response to this. VERY busy day yesterday! I did get a chance to fill in those gaps with some additional glue though just to demonstrate what I'm talking about:

Filled.jpg


This is by no means a certainty. I am of the view that it's the more likely explanation though.
 
Sorry for the delayed response to this. VERY busy day yesterday! I did get a chance to fill in those gaps with some additional glue though just to demonstrate what I'm talking about:

View attachment 1799757

This is by no means a certainty. I am of the view that it's the more likely explanation though.
I understand that you have a lot of work don't worry but I saw that on the MOM discussion thread :)
 
Got the Hero kit in the mails the other night. Finished the control box exterior.

The rails were a little bit tricky to glue on the box and the card needed some sanding but I think it turned out good enough. I might revist it with some new rails if I find them, or even vintage plastic T and L track ;) (if I can find it haha).

Question, where did you source the rails from if you don't mind me asking? And would you ever consider to sell cards separately?

Anyways, it's far too cold here to paint it so it'll have to be naked for a while.

I'm hoping to make it full vintage with its calculator board (model B), vintage extension board card, and even rails if I can find any.

It'll be fun! The machining and over all design is incredible. Impressive job :)


1000003857.jpg


The rails are a slightly wonky but I'm sure they're not perfect on the real one anyways


The rails are a little wonky but I'm sure they're not perfect on the real one either.
 
Got the Hero kit in the mails the other night. Finished the control box exterior.

The rails were a little bit tricky to glue on the box and the card needed some sanding but I think it turned out good enough. I might revist it with some new rails if I find them, or even vintage plastic T and L track ;) (if I can find it haha).

Question, where did you source the rails from if you don't mind me asking? And would you ever consider to sell cards separately?

Anyways, it's far too cold here to paint it so it'll have to be naked for a while.

I'm hoping to make it full vintage with its calculator board (model B), vintage extension board card, and even rails if I can find any.

It'll be fun! The machining and over all design is incredible. Impressive job :)


View attachment 1801996

View attachment 1801997

The rails are a little wonky but I'm sure they're not perfect on the real one either.
Hi Kevin!

Thanks so much! Wow! You got that put together fast!

In answer to your question, the rails are the 2.4mm ABS Plastruct T and L (T03 and A03). These are technically the "vintage" rails as they're likely the ones used on the original prop and haven't changed.

They are indeed very fiddly! :p

The glue that I'm using is B7000 which is quite forgiving and any mistakes can be cleaned up as you go.

They didn't have this luxury back then though, so they were probably using superglue or maybe a polyurethane glue.

I'll look forward to seeing the finished thing when the weather warms up for you.

Thanks again Kevin!

All the best,

Dave
 
Hello there!

Just a very quick end-of-month update...

It’s been a particularly busy time this month! As I mentioned previously, this month I needed to allocate some time towards finishing February's orders, which had been on hold until the new rails arrived.

This took a little longer than anticipated however, which did not leave enough time to fully finish March’s commissions by the end of the month unfortunately.

They are running roughly a week behind and I hope to have these finished and shipping out around the end of this coming week. (y)
  • Small DIY orders are finished and sent
  • Small, fully finished commissions (Ctrl boxes/reveal boards) are finished and sent
  • Large (full hilt) DIY orders are finished and will be sent out in the next available collection
  • Fully finished commissions are running slightly behind schedule by roughly 1 week unfortunately.
As always, rushing these is not an option, but I have been putting in MANY additional hours of work to try to catch up and keep the delay to a minimum.

Bodies are almost complete. They have been prepped, had additional accuracy details added, and have been masked and painted (black). All that remains for the bodies is to mask and paint the necks.

COLLAGE.jpg


Then, final assembly and weathering can be done.

Work has already begun on preparing control boxes and small parts such as tri-rings, rails, box plates, etc.

As things are not too far behind schedule, I’ve decided to go ahead and add stock to the site as planned tomorrow:

(April 1st - Midday UK time).

I know that there are some people waiting to place orders, so rather than confuse matters by adding stock in the middle of the month, I’ll be going ahead as planned. (y)

As March’s fully finished commissions are still a little behind schedule though, I do need to give a heads up that these will need to take priority.

I’ll be adding only a very small number of commissions this month (fewer than last month even) in the hope that I can finally get ahead of things.

On reflection, the 28day/four week lead time on fully finished commissions is just not working out.

Regardless of quantities, I always appear to be in a position of catching up and having to apologise.

There was a valid reason this month of course, but the pressure of completing these within a four week period is just proving to be impractical.

For this reason, going forward I’ll be putting a lead time of six weeks on fully finished commissions instead of four.

All other DIY orders and smaller commissions will remain at 28 days. Smaller (non-hilt) orders should ship out within the first couple of weeks.

I hope this sounds ok to all those considering placing an order this month.

On a slightly different note, I have been receiving a lot of enquiries regarding future additions to the site. Particularly the V2 and V3. These WILL be added to the store in the summer. I was forced to sell my own V2 and V3 recently, so I am very excited to add these to my own collection again soon! Dimensionally, these will be identical to my previous versions. I am changing how I go about having them made slightly, but dimensionally the final product will be exactly the same. I’ll share more details on these new additions closer to the time.

TWINS.jpg


Before I sign off, I’d just like to say a huge THANK YOU! to all those who have supported the site and my work over the past few months! It’s massively appreciated!

I hope you’re all having a great weekend, and wishing you all very Happy Easter!

All the best and as always, MTFBWY!

Dave
 
Back
Top