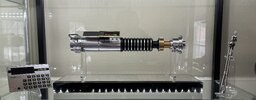
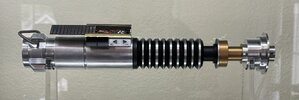
Interest DaveP's 40th Anniversary Luke Hero (Interest Thread)

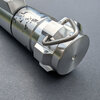
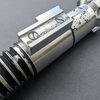
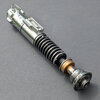
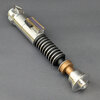
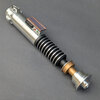
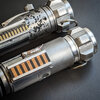
Anddd the grand reveal.... View attachment 1809444

I'm pretty happy with the overall paint job. My first go around with the black I messed it up so I had to redo it. That meant stripping it with IPA and remasking which wasn't partially fun to do. Way more satisfied with the new black though. A piece of advice for people working on a kit- Mask off the silver rings!! I didn't because I thought sanding back the black that was sprayed over would be simple enough. It was very time consuming because I was using a very worn sanding sponge as to not sand away parts I did not want to. And it was also stressful because the bottom ring is so close to the full black section. Anyways this is my paintjob! Tell me what you think!


Sorry for the poor camera quality too lol. My phone is old.

Edit- Does the gold color seem too yellow? I'm stuck finding myself comparing it to references and it just seems too bright to me. I followed Halliwax's Ace Antique Gold tip. Is that the paint people are still using, at least in the US?
 
Last edited:
Hello there.

Just a quick reminder:

** I'll be listing the last remaining stock of Yuma / I.S.Y.H.C.A.N.L / V1 hero on my store today (midday UK time). **

I'll be working on these throughout June and July.

May's commissions are very nearly finished and will be sent out soon.

From August onwards I'll be working exclusively on my latest V2 / V3 offering for the remainder of the year.

I'll be making an official announcement soon with more details.

Please be aware that remaining stock is extremely limited (only 5X V1 heroes remaining!).

Many, many thanks to everyone who has taken part in this latest run! I can't thank you enough for your support!

All the best and MTFBWY!

Dave
 
Amazing kit DaveP , keep em coming!

Should out to 3251bimmer for the commission and vintage upgrades!
 

Attachments

  • IMG_1707.jpeg
    IMG_1707.jpeg
    991.5 KB · Views: 137
  • IMG_1707.jpeg
    IMG_1707.jpeg
    275.9 KB · Views: 139
You the man
That would definitely be you, Danny! :D

Thanks Mate.
Amazing kit DaveP , keep em coming!

Should out to 3251bimmer for the commission and vintage upgrades!
Thanks Mike! LOVE this display! Exceptional work from 3251bimmer as always!

The kits WILL be back. There are literally only X2 Hero control boxes left now though (and two months to fill until my V2/V3 run. So really have to reserve them for full commissions unfortunately.

They will be back towards the end of the year though. (y)
 
Hey DaveP - am I correct in guessing that this piece of brass is not used on the reveal board?

DP brass.jpg


I couldn't discern where it might be from the pics in your tutorial. Also, thanks very much for arranging the pieces in a rough layout of where they go on the board - very helpful! (y)

You also state in the tutorial that "the board is supplied with a small section of acrylic which can be used as a riser inside the box..." That piece of acrylic was missing from my kit, so I was hoping that you could give me the dimensions of it, so I can scrounge up something similar.

Thanks!
 
Hi Tim.

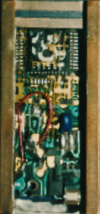
As Shane said, there does appear to be something (??) on the right side of the chip:

ORIGINAL PROP REFERENCE 02.png

In a different reference though, that is much clearer, this piece is definitely missing. So maybe it was there and then later fell off, or perhaps it's an artifact in the earlier reference (and was never there)?

Unfortunately, I'm not able to share the other reference, but I can say for certain that at that stage at least, it was missing.

Sorry to hear that the riser was missing! I've been using a small section of 6mm acrylic rod. Anything that matches this would do the trick though.

This sits the board slightly lower than previous runs (based on new observations). Very slightly. It sits the board at the correct height in relation to the switch too.

Hope this helps, and apologies again for the missing piece.

All the best,

Dave
 
In a different reference though, that is much clearer, this piece is definitely missing. So maybe it was there and then later fell off, or perhaps it's an artifact in the earlier reference (and was never there)?

Unfortunately, I'm not able to share the other reference, but I can say for certain that at that stage at least, it was missing.

Sorry to hear that the riser was missing! I've been using a small section of 6mm acrylic rod. Anything that matches this would do the trick though.

This sits the board slightly lower than previous runs (based on new observations). Very slightly. It sits the board at the correct height in relation to the switch too.

Hope this helps, and apologies again for the missing piece.
No worries Dave! That answers my questions - thanks for the info! (y)
 
Hi Tim.

As Shane said, there does appear to be something (??) on the right side of the chip:

View attachment 1828319

In a different reference though, that is much clearer, this piece is definitely missing. So maybe it was there and then later fell off, or perhaps it's an artifact in the earlier reference (and was never there)?

Unfortunately, I'm not able to share the other reference, but I can say for certain that at that stage at least, it was missing.

Sorry to hear that the riser was missing! I've been using a small section of 6mm acrylic rod. Anything that matches this would do the trick though.

This sits the board slightly lower than previous runs (based on new observations). Very slightly. It sits the board at the correct height in relation to the switch too.

Hope this helps, and apologies again for the missing piece.

All the best,

Dave
I can say having built several that that piece falls off very easily. Not a lot of contact area… so it’s highly likely it just fell off at some point
 
Hey guys,

Wanted to see if anyone has grabbed an extra V1 HERO KIT from DaveP. If they would be willing to sell one to me please. Unless anyone knows of someone who bought more than one kit, so I could hit them up? I was having someone do the commissioned build, we assumed it wasn’t gonna stop so soon, since this run is so popular. DaveP mentioned, that the V1 HERO kits will be back again at the end of the year. So now I’m trying to hunt one down. Any help would be greatly appreciated guys.

Thank you
 
Last edited:
Hello Everyone!

As it’s the end of the month, I figured I’d post an update on where things are up to with regards to the remaining Yuma / I.S.Y.H.C.A.N.L / V1 Hero commissions, as well as the preparations for the next run of V2 / V3 beginning in August.

All of May’s orders are now finished and sent out (except for where I’ve been asked to look after them due to vacations, etc).

Thank you so much to everyone who placed an order in May, for your support and also for your patience! I did intend on getting these out to you before my family vacation at the beginning of this month, but as you know, it wasn’t to be. So, I thank you again for being so very understanding about the additional delay.

I posted some pictures of some of the finished commissions on FB and Instagram, but for those of you who missed them, here are some from this latest batch:
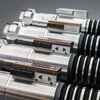
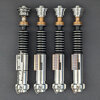
PXL_20240624_133816010 copy 2.jpgPXL_20240624_133741374 copy 2.jpgPXL_20240624_131946010 copy 2.jpgPXL_20240624_132002264 copy 2.jpgPXL_20240624_132035304 copy 2.jpgPXL_20240624_132337794 copy 2.jpgPXL_20240624_133002193 copy 2.jpgPXL_20240624_133033575 copy 2.jpgPXL_20240624_133233430 copy 2.jpg

All of June’s small orders such as Tri-Rings and DS2 Brass are up to date and sent out.

I’m now working exclusively on finishing the last remaining stock of Yuma /I.S.Y.H.C.A.N.L / V1 Heroes, which were ordered this month.

Work has started on these and I’m hoping to have them finished and sent out around the middle of July.

Bodies are prepped/masked and ready for painting this coming week!

All V1 Heroes are taken, but **there are a couple of Yuma and I.S.Y.H.C.A.N.L spots still available on the store!**

I’m working on finishing these alongside the others regardless. So if you’d like to add a Yuma or I.S.Y.H.C.A.N.L to your collection, they can be claimed via the store as usual, and will be finished and ready to send out in a couple of weeks.

V2 / V3 Progress:

I’ve been spending my evenings sat at the computer recently, finishing up the drawings and models for my upcoming run of V2 / V3.

I’m very excited about this and can’t wait to reveal everything very soon!

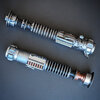
Dimensionally, the V2 is going to be almost Identical to my previous run. I was Very, Very happy with how it came out. To be honest, had I not been forced to sell my own personal V2 and V3 last year, I would have probably skipped over doing another run. I am desperate to be reunited with these props however, so I’m really looking forward to working on them once again.
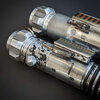
Twins1 copy.jpgTwins2 copy.jpgTwins3 copy.jpgTwins4 copy.jpgTwins5 copy.jpgTwins6 copy.jpgTwins7 copy.jpg

There really are very few changes, other than my approach to machining, and some minor changes to the internal construction. This requires fresh models and drawings for all parts of course, but these are almost done.

I’ve written out the text for the project and will be posting an interest thread over on the RPF once I have all the details finalised and quotes for parts, etc.
The biggest change, this time around is that I will be using my own clamp. This is proving to be a bit of a project in itself, as I am approaching things VERY differently to how I had my previous clamp made.

COLLAGE 800.jpg


I was immensely proud of the Static Obi run, but it was not without it’s issues along the way. The clamp in particular presented me with a litany of problems, very nearly derailing the whole run at one stage. The end product looked great externally, but the manufacturing methods that were used to make the actual parts (against my instructions) meant that internally, there were things that I would like to improve upon this time around!

Using the same dimensions, which I was more than happy with, I have designed the tooling needed to form the parts myself. This is more inline with the way that the original parts were made and avoids the need for CNC folding. The end results should be more accurate, as well as being more authentic to the original.

I’ll be going in to more detail on this in my next update, but I’m very excited about it to say the least!

All shall be revealed very soon!

This run will work a little differently to the Yuma / I.S.Y.H.C.A.N.L / V1 Heroes. I’ll be ordering a limited number of parts for V2 and V3 and posting them on the store all in one go as “pre-orders”.

These will go live on August 1st (midday UK time)

The initial deposit price will be to cover the cost of manufacturing, and will reserve your place on the run.

I’ll then work on finishing orders in batches of ten throughout the remainder of the year, or until all work is completed.

A second painting/weathering fee will then be taken (along with shipping) once all work is completed. This will help to spread the funding of the project over the course of it’s duration, paying for materials, paints, chemicals, etc as and when they need to be replenished.

I won’t be putting a strict timescale on these, but I expect to get through a batch of weathering commissions each month.

I’ll have prices worked out soon (once I’ve submitted final drawings / models).

I’ll be ordering parts prior to August 1st, so that I can begin work on clamps, and so that the CNC’d parts arrive shortly after taking orders!

In the meantime, I’ll be working exclusively on completing my remaining Yuma / I.S.Y.H.C.A.N.L / Hero commissions during the day, whilst finalising and submitting drawings in the evenings.

I’ll continue to keep everyone updated with progress going forward.

Thank you again for your phenomenal support everyone! It really does mean the world to me.

All the best and as always, MTFBWY!

Dave
 
I can’t wait for this! I love my V2 and I desperately want a V3 upgrade. With regards to paint and weathering of the V3, will you be offering production, post-production, and Obi stunt styles or just the well known post-production look since it had the most reference pics?
 
I can’t wait for this! I love my V2 and I desperately want a V3 upgrade. With regards to paint and weathering of the V3, will you be offering production, post-production, and Obi stunt styles or just the well known post-production look since it had the most reference pics?
Hey Mo.

Sorry for delayed response. In answer to your question, there will be two options for the V2 and two for the V3.

Early Production (Sand Storm) and Post Production (Pop Culture Quest) for the V2

On-Set/Production (Throne Room) or Post Production (Nasa Style) for the V3

I'm open to requests though regarding other possible styles like matching the resin stunt for example. (y)
 
**UPDATE**

Hi everyone.

I just wanted to drop a quick update as I have been very busy behind the scenes, and wasn’t able to post one over the weekend…

Work on Yuma / I.S.Y.H.C.A.N.L / V1 Hero Commissions is VERY nearly complete!

I have hit a small obstacle though as I am currently waiting for the Bronze Gold paint that I use to be restocked by my UK distributor:


I have been in contact with them, and they have a shipment on its way to them and in customs.

As soon as it is back in stock, I will be ordering using their fastest / next day delivery service!

I apologise for this delay. I was hoping that it would be back in stock in time for when it was needed, but it is now holding me up on the painting side of things.

Grip sections are all painted, and everything is masked ready for painting as soon as the gold paint is available.

NECKS MASKED.jpg


There is a link on the store page to be notified, so feel free to enter your email there. It might potentially speed things along if they see more people waiting. Although, I have been assured that it should be any day now.

Work is pretty much complete on all finer details such as reveal boards, rails, Tri-Rings, etc.

REVEAL BOARDS.jpg


I am currently in the process of constructing Hero Control boxes ready for final assembly.

Everything is very much coming together, and these remaining commissions will be finished and ready to go very soon!

I’ll inform you all as soon as I’m able to purchase the paint that I need for the necks.

V2 / V3 Run…

Much progress has been made on the upcoming V2 / V3 run also...

I’m very excited to announce that the Parts are all now “IN PRODUCTION”!!! All models and drawings were submitted over the weekend and prices have been locked in!

PARTS_RENDER_COMP 800.jpg


It’s great to have the production drawings finished, but I’m not able to share these publicly obviously.

My next task is to create the artwork for the announcement thread, including overlays and high poly renders.

I just need a little more time to prepare the actual announcement thread and to mock up the various options for finishing commissions. Now that the parts are all in production, my evenings are free to focus on this so hopefully won’t be too much longer.

The thread itself is written, and I can’t wait to share with you the details of each hilt and their various finishing options.

Every single part has been a little project of it’s own. The V3 Pommel for example, may look quite similar to that of the V2, but in reality, every cube is unique. The largest one being significantly larger than the smallest. The model has been overlaid with all available references to ensure that every surface, edge and incline is 100% accurate to the original prop.

V3_POMMEL_PROCESS.jpg


As you can see, I’m now in the process of taking the final models and generating high poly artistic representations of the final weathered parts.

I’ll be ready to publish the official announcement thread as soon as these are completed.

POMMEL HP.jpg


Ideally, I would have liked there to have been more time between publishing the interest thread and actually making them available, but it’s looking like there might only be a week between them.

I AM still planning on listing these on the 1st of August for pre-order. As mentioned previously, this will cover the cost of the parts. A second/final payment will be payable upon completion of any weathering commission. Or in the case of DIY kits, A final payment for shipping once all parts are ready to ship.

All of this will be covered in the official thread (along with prices) as soon as I get the final artwork together.

As mentioned, this is my evening job! So I’ll be signing out and cracking on with commissions now.

I’m hoping to have Hero Control Boxes assembled by the end of today! After this, I’ll be waiting patiently for the arrival of Gold Paint! Hopefully within the next couple of days. I will of course keep you updated on this!

Thank you all so much for your patience and continued support!

All the best and MTFBWY!

Dave
 
Hey guys,

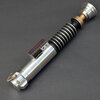
I know this has been discussed a ton on this thread so I don’t mean to sound like a broken record. I received my Dave Parkin Art Luke Skywalker V1 Hero Lightsaber and man is it stunning! I’ll post photos later on. I opted for the Cave scene look with no weathering minus the v-ring and tool marks on the control box and it has brass rails rather than copper.

This is a topic of hot discussion since it’s still in the air. It seems like the rails were brass in the ISYHCANL scene and possibly during the Cave scene, but later changed to being painted or taped with copper to match the board as seen in modern day times.

So what’s everyone’s verdict? If you were doing a Cave scene variant, would you guys opt for brass or copper?

Thanks for the input.

MTFBWY
 
I don't trust anything about the current state of the props considering what happened to the rest of the sabers post-production, and to be honest, the one time you see the card on film (the walkway insert shot) it looks like brass. I really prefer the look of brass/antique gold neck. I wish we could get a run of brass/blue boards.


vlcsnap-2024-08-13-10h48m03s141.jpeg
 
As Bryan from Veracity Labs has explained before, lighting can create tricks. Here is a color corrected photo he provided:

Capture.jpg


For this reason, I think the raw movie shots aren't always reliable. I still chose to go with brass rails for my ISYHCANL though. But my point is even though they also look brass in the Cave Scene Shot, they might just be copper which is why I went with that for my V1. To me the tarnishing on real copper matches what is seen in the Identities pictures. Although some do argue that painted copper is what does the job better.

I guess at the end of the day we'll find out for sure when the Lucas Museum opens soon :)
 
As Bryan from Veracity Labs has explained before, lighting can create tricks. Here is a color corrected photo he provided:

View attachment 1850065

For this reason, I think the raw movie shots aren't always reliable. I still chose to go with brass rails for my ISYHCANL though. But my point is even though they also look brass in the Cave Scene Shot, they might just be copper which is why I went with that for my V1. To me the tarnishing on real copper matches what is seen in the Identities pictures. Although some do argue that painted copper is what does the job better.

I guess at the end of the day we'll find out for sure when the Lucas Museum opens soon :)
Mannnn, you’re not making this decision any easier. Thanks for the info and reference photo! Good stuff.
 
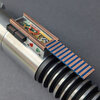
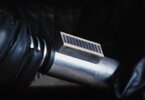
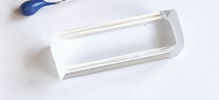
Finally putting this control box together. Maybe I've missed the answers somewhere in this thread, but wanted to ask if anyone knows where this clear plastic piece goes?

Screenshot 2024-08-31 at 5.42.07 PM.png

And thoughts on installing the arrows without them falling out?

Any assistance will be appreciated.
 
Back
Top