gt350pony66
Master Member
i can also see where soldering will be a delicate thing, but not too terrible
Thanks!.....I only saw them there:
It just says contact supplier....no add to cart?
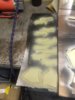
lots more than this done yesterday, but here's a few pics of what I did. I couldn't tell from Harddrive's pic how he did the wall but this seemed like the simple approach to mating the new walls to the ceiling ring
There was a gentleman from Japan who did this approach back in 2010 and it turned out nice, but I thought the walls there too thick. I can post all 21 pics if you'd like, it might give you some ideas. Here are a few, I'll just post the thumbnails.
View attachment 1260450View attachment 1260451View attachment 1260452View attachment 1260453View attachment 1260454View attachment 1260455
that pretty much looks like what I'm doing, I' glad I got it right LOLThere was a gentleman from Japan who did this approach back in 2010 and it turned out nice, but I thought the walls there too thick. I can post all 21 pics if you'd like, it might give you some ideas. Here are a few, I'll just post the thumbnails.
View attachment 1260450View attachment 1260451View attachment 1260452View attachment 1260453View attachment 1260454View attachment 1260455
Yep, that's my preferred method, but I'll have to glue some tiny evergreen rod just inside the opposing wall so it'll have something to stick it to. if I try just sticking it to the outside it'll be sloppyThey turned out really well. I have used really paper thin styrene sheet before for diffusing and it works nicely

well, my idea of having the covers set inside the walls didn't seem to work, so here it is taped down on the outside edge. now it's a matter of what to use the stick it down flush and not slop glue
Awesome, thanks brother. i so didn't want to try doing it with testors or CA because you know it would slop out somewhereAside from being very careful applying CA glue...…...you can try these glues:
Amazon.com: Aleene's 25115 Trial Pack Tacky Glue, 5pk
Shop Aleene's at the Amazon Arts, Crafts & Sewing store. Free Shipping on eligible items. Save on everyday low prices.www.amazon.com
They dry clear, cleanup with water and will not harm paint. The fast grab and quick dry are really good. I use them to anchor Fiber Optic strands in place. Glue covers down and tape to hold in place and clean any excess with water / q-tip before it dries. Canopy glue works the same way but is much thinner. Those other glues are thick.
Awesome, thanks brother. i so didn't want to try doing it with testors or CA because you know it would slop out somewhere
i ordered some, be here friday. there's plenty other to do so I can wait. i use laserbond on a lot of stuff but no way to use it here. thanks for the tip dudeThe pack of glue is cheap so it's worth a shot. Do one and see how it comes. It take a few hours to dry and for it to turn clear. If you don't like then you should be able to remove it. I use that glue all the time especially with FO and to glue small parts after all is painted/clear coated and don't want to ruin anything with CA or the Tamiya plastic glue.
the last couple of pics are my first attempt with a single LED, not bad but wasn't good enough. the rest are the second try with two, much better. although it doesn't illuminate completely top to bottom and the camera doesn't catch the dark areas, it'll do. though for future projects I'll definitely be looking into the strip LED's that Teslabe pointed out
Thanks, I'm having a good time with it. i just kinda guessed at the colors. since the instruction were in color i just took it with to the hobby shop and got what looked close. I use model master acrylic, if you want those numbers i can get them for youI'm enjoying following your build. I'm getting ready to dive into this kit myself and was wondering what paint / colors you are using for the floor and walls?
Thanks, I'm having a good time with it. i just kinda guessed at the colors. since the instruction were in color i just took it with to the hobby shop and got what looked close. I use model master acrylic, if you want those numbers i can get them for you
sure, no problem. I'll be home late tonight but I'll get that for you as soon as i canI'd like those numbers, thanks!