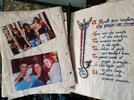
Charmed!

rorschach999 Hi! Would you mind sharing your Charmed pages with me?

I have gathered about 300 or so images from searches/different sites and bought a printer to create my version. The problem I'm having is figuring out page numbering and what I'm missing. Your help would be super appreciated!! Thanks for reading :)
 
Am I going to have to duck for pointing out a seller on eBay Propabilia with Charmed paper stuff?

No connection, save the several times my counter offers were rejected, but I haven't seen any negative to speak of, and I am not much of a fan anyway...

Oh, now I DO have to duck!
 
I ended up finding a ton of images in various locations and organized them into folders that made sense to me. I created a 709 page PDF in a custom order for my replica Book of Shadows.

I've already printed, but am determining best methods of aging the paper.

After aging, I plan on binding the pages with screw posts like the show and so I can add or move pages around after completion. And I've already got my leather for the cover purchased!

Project is coming along well so far!

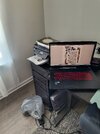
Would be great to see your replica when it's finished.
 
So... after a few attempts at aging the paper, I realized a few things.

First: don't use an inkjet printer. I feel like that was super obvious after I started. Luckily, I only did a few pages before realizing, I'm an idiot.

the naked gun facepalm GIF

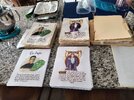
I reprinted my PDF file using a color laser jet and regular paper. I printed double-sided and specifically left blanks throughout for heavily colored images. I figured that too heavy a weight of paper would make the book extremely thick once the pages were dyed. Regular-weight printer paper has worked very well so far. My PDF is about 720 pages which includes blanks and no duplicates.

Note: I kept the inkjet printout as a baseline for re-ordering the pages once they were dyed & dried. They will get out of order and you'll need to refer back to your PDF order or have a second printout.

IMG_20240728_110415631_HDR.jpg

Second: you can use tea or coffee to dye the pages and you can do it in bulk. I went with a flavored tea because I had it on hand (and it made my entire house smell amazing - vanilla caramel). You will want to add a bit of baking soda to your tea mixture to neutralize the acidity. Not much is needed though. I used a pH meter to confirm the liquid was ~7pH. I only used a handful of tea bags - maybe 5-7? I would refill the water and add ~2 tea bags each time. And to be clear: I dyed the pages in big batches AFTER I printed.

The process: To start - get a big casserole dish, at least a 9x13. Pour in your tea mixture OR do what I did and put the tea bags in the casserole dish and pour hot water in it (fewer dishes this way). Stir in a tablespoon of baking soda. Add as much tea as you'd like to get the color that you want. I didn't want my pages to be super dark.

Once the mixture is where you want it to be, take an entire stack of 50-75 pages and dunk it into the casserole dish with your tea mixture. Make sure all the pages are covered with the liquid. Depending how dark you want your pages, you can let them soak for a longer period of time. I did about a minute or two.

Then, CAREFULLY... very very carefully, grab the stack and hold above the dish to let it drain a bit. Set it aside on a cookie sheet or other flat surface. Do not use a cooling rack or anything with gaps because it'll show on your paper when it's dry.

Third: drying time is a pain. There are multiple methods you can do to dry your paper. This depends on you and how you want to spend your time. There is the oven method - set to 250-300*F and set the papers in there and take out when they're dry. I started with this method and then realized I have 720 pages and I just don't got the time to sit by my stove to dry my paper.

So instead, I put my stack of papers on several cookie sheets and put them in my basement. I have a dehumidifier in the basement, so this process went a little quicker for me. I let the paper sit overnight - they were still dripping wet when I put them in the basement.

The next morning, I went downstairs and started to flip stacks over and split them. This helps get those pages in the middle or bottom air time.

After about 24 hours, the pages were slightly damp still. I took the time to separate every page from their stack and criss-cross them over each other. This helped with air flow.

Luckily, I went out of town for the weekend after that step. So the papers sat for 3 days not being touched. When I was able to get home and get to them, I noticed that some pages had stuck together (heavy inked images mainly) and ripped when I pulled them apart. I ended up reprinting maybe 30 pages and re-dyed them. I used the oven method for those individually so it wouldn't have the same problem.

IMG_20240807_102637048.jpg

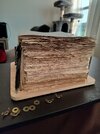
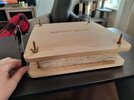
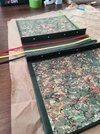
Fourth: your pages stacked is going to be huge! You'll need a book press or a heavy weight to squish them down. I am waiting for my new pages that I just dyed yesterday to finish flattening before I can truly determine the spine size. I will probably leave them in my wooden book press for a few days.

I'll post again once I have started the binding process. :)

IMG_20240805_194052851_HDR.jpg
IMG_20240805_194659008_HDR.jpg
 
So... after a few attempts at aging the paper, I realized a few things.

First: don't use an inkjet printer. I feel like that was super obvious after I started. Luckily, I only did a few pages before realizing, I'm an idiot.

View attachment 1848629

I reprinted my PDF file using a color laser jet and regular paper. I printed double-sided and specifically left blanks throughout for heavily colored images. I figured that too heavy a weight of paper would make the book extremely thick once the pages were dyed. Regular-weight printer paper has worked very well so far. My PDF is about 720 pages which includes blanks and no duplicates.

Note: I kept the inkjet printout as a baseline for re-ordering the pages once they were dyed & dried. They will get out of order and you'll need to refer back to your PDF order or have a second printout.

View attachment 1848625

Second: you can use tea or coffee to dye the pages and you can do it in bulk. I went with a flavored tea because I had it on hand (and it made my entire house smell amazing - vanilla caramel). You will want to add a bit of baking soda to your tea mixture to neutralize the acidity. Not much is needed though. I used a pH meter to confirm the liquid was ~7pH. I only used a handful of tea bags - maybe 5-7? I would refill the water and add ~2 tea bags each time. And to be clear: I dyed the pages in big batches AFTER I printed.

The process: To start - get a big casserole dish, at least a 9x13. Pour in your tea mixture OR do what I did and put the tea bags in the casserole dish and pour hot water in it (fewer dishes this way). Stir in a tablespoon of baking soda. Add as much tea as you'd like to get the color that you want. I didn't want my pages to be super dark.

Once the mixture is where you want it to be, take an entire stack of 50-75 pages and dunk it into the casserole dish with your tea mixture. Make sure all the pages are covered with the liquid. Depending how dark you want your pages, you can let them soak for a longer period of time. I did about a minute or two.

Then, CAREFULLY... very very carefully, grab the stack and hold above the dish to let it drain a bit. Set it aside on a cookie sheet or other flat surface. Do not use a cooling rack or anything with gaps because it'll show on your paper when it's dry.

Third: drying time is a pain. There are multiple methods you can do to dry your paper. This depends on you and how you want to spend your time. There is the oven method - set to 250-300*F and set the papers in there and take out when they're dry. I started with this method and then realized I have 720 pages and I just don't got the time to sit by my stove to dry my paper.

So instead, I put my stack of papers on several cookie sheets and put them in my basement. I have a dehumidifier in the basement, so this process went a little quicker for me. I let the paper sit overnight - they were still dripping wet when I put them in the basement.

The next morning, I went downstairs and started to flip stacks over and split them. This helps get those pages in the middle or bottom air time.

After about 24 hours, the pages were slightly damp still. I took the time to separate every page from their stack and criss-cross them over each other. This helped with air flow.

Luckily, I went out of town for the weekend after that step. So the papers sat for 3 days not being touched. When I was able to get home and get to them, I noticed that some pages had stuck together (heavy inked images mainly) and ripped when I pulled them apart. I ended up reprinting maybe 30 pages and re-dyed them. I used the oven method for those individually so it wouldn't have the same problem.

View attachment 1848627

Fourth: your pages stacked is going to be huge! You'll need a book press or a heavy weight to squish them down. I am waiting for my new pages that I just dyed yesterday to finish flattening before I can truly determine the spine size. I will probably leave them in my wooden book press for a few days.

I'll post again once I have started the binding process. :)

View attachment 1848626
View attachment 1848628
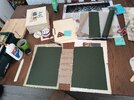
Well, while bookbinding is thrilling, it is also quite messy. There is glue in places that I didn't know glue could go - it reminded me of this scene from Dumb & Dumberer:


Anyway, you asked for a follow-up on the final product and I am nothing but a people pleaser.

TL;DR I am 95% of the way there! The only thing I'm missing is longer binding screw posts which will be delivered Monday and maybe some distressing on the cover. What are your thoughts? Should I distress the cover? Finished pictures at the very bottom.

Process:
I thought aging the paper would be the messiest part, but I was wrong. Gluing is super messy and annoying. It took a few days to put the cover together entirely as there were multiple steps and I wanted to wait for pieces to dry before moving to the next step.

Supplies:
  • Book Board
    • I used 12x12 70 pt sizing - if I could do it again, I'd probably go a little heavier on the board.
    • Purchased: Amazon.com
  • Textured Leather in Green
    • I used the entire length and my book is 9x12x4 as I used standard letter size 8.5x11 paper.
    • Purchased: Amazon.com
  • Binding Screw Posts aka Chicago Screws ---
    • I did a 4" spine with 4 holes and the first set I purchased did not provide enough length. I will use both sets combined to get the 4" length I need.
    • Purchased (1st set): Amazon.com
    • Purchased (2nd set): Amazon.com
  • Glue
    • I used Elmer's Glue - All Purpose from Walmart. If I could do it again, I probably would have bought specific PVA glue for book binding.
  • Photo Paper - Matte
    • Optional
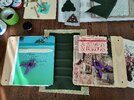
    • I chose to print my end papers on matte photo paper to get the richness of the green design.
    • Amazon.com
  • Photo Paper - Gloss
    • Optional
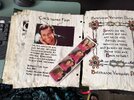
    • I chose to print out some photos to add to the book. I printed out a 4x6 photo for Cole and the photo strip of Cole & Phoebe to put on the Belthazar page.
    • I also printed each set of 3 sisters near the front of the book next to the Power of Three spell.
    • https://a.co/d/0pwc4UA
  • Ribbon
    • Optional
    • I bought this from Walmart's craft section. I chose Red, Gold, & Blue 1/4" thick. I wish they had 1/2" as I would have preferred that size.
  • Twine
    • Optional
    • I bought this from Walmart's craft section as well and doubled it up to make a thicker line.

Steps:
  1. After printing and aging the papers, I determined that I wanted to have a 1/2" extra on each side of the cover (excluding the spine side). I cut 2 of the 12"x12" book boards to size.
    • I was using standard 8.5"x11" paper to age, so that meant my covers would be 9"x12" (1/2" on the one side, 1/2" on top, and 1/2" on bottom).
  2. Next, I needed to decide on spine size. I measured my stack of aged paper and determined it was close to 4" tall. I cut another piece of book board to 4"x12".
  3. Since I was making a post-bound book, I cut out two 1"x12" pieces out of the book board for the pages and post holes.
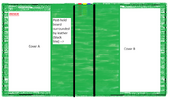
  4. After all the boards were cut, I lined the covers and spine next to each other and put a tiny space (3/8" if that) in between to allow for the folding of the covers. I taped them together with painter's tape.
    • Your layout should be COVER + tiny gap + SPINE + tiny gap + COVER
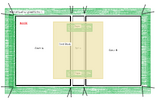
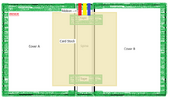
    • Note: you do not need your post-hole boards yet. 1.png2.png
  5. Next, I glued an 8.5"x11" piece of cardstock over the boards and gaps as a more permanent solution to allow the cover to flip around without losing the gap.
    • It doesn't matter what you use here - it'll be covered up anyway.3.png
  6. While that was drying, I cut my leather pieces to size.
    • There are two options:
      1. Go the entire length of the cover & exterior spine in one piece - say 13.8"x26"
      2. Split up the cover & exterior spine into 3 pieces. (this is what I did)
    • I cut my pieces to 10"x13.8" (the length of the leather I bought - so no need to cut) for each cover.
    • For the exterior spine, I wanted it to overhang onto the covers so I took 4" + 2" on each cover. I cut 8"x13.8".
    • For the interior spine and to cover the post-hole boards, I measured the spine, each side of the boards, and 2" excess on each side. 4" spine + 1" post-hole (front) + 1" post-hole (back) + 1" post-hole (front) + 1" post-hole (back) + 2" on cover + 2" on cover = 12"x12". This is the only piece of leather that I shortened from its given length (13.8").
    • I also wanted to do decorative corner protectors. I cut two 6" squares, then cut them into triangles.
    • Note: in total, you should have:
      • 2 cover pieces (10"x13.8")
      • 1 exterior spine (8"x13.8")
      • 1 interior spine (12"x12")
      • 4 triangles cut from 6" squares
    • If you used the same leather as I did, you should have a few scraps left. I used what was left to cut the back for my triquetra symbol.
  7. I waited a few hours or even overnight between gluing steps.
  8. First I glued the leather to the covers. Doing the best to keep them centered with about 1/2"-1" overhang on the non-spine edges.
  9. Next, I took my twine and cut 4" lengths for 10 pieces. I wanted to have 5 ridges on my spine. I took 2 pieces twirled together and glued it down to the spine. IMG_20240812_134138455.jpg
  10. After the twine was dry, I glued down the exterior spine piece. This took careful precision because you don't want any gaps. You need to press the leather into the edges of the twine to get the desired effect. IMG_20240812_170517305_HDR.jpg
  11. Once all is dry on the exterior of the spine, you'll want to flip it over and start trimming the corners of the leather on each cover. You don't want to cut too deep into the corner, as you want the pieces to overlap on the inside. 4.png
  12. Next, trim a bit of space on the leather of the spine. Expose the area of the gap a bit so that you can fold the leather down and glue.
  13. At this stage, you can attach your ribbon to the top of your spine. I glued about 2" of ribbon and cut to my desired length for my book.5.png
  14. While that is drying, you can prepare your post-hole boards by gluing them to your interior spine piece.
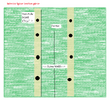
    • Since my spine is 4" with a 3/8" gap, I found the center of my 12"x12" piece and marked about 2 1/8" on each side from the center. That should give you the 4" coverage for the spine plus any wiggle room for the gaps.
    • Once those were marked, I took my post-hole boards and hole-punched out where I wanted my posts to go. I chose to do four holes - ~2.5" from each other.
    • I carefully glued both post-hole boards along the outside 2 1/8" lines I created from the center. 5a.png
  15. After the post-hole boards are glued flat, you will want to fold the leather from the outside in and over the top of the post-hole board to cover it up. Make sure you poke holes in the leather so you know where the holes are and can make the holes bigger once it's dry.
    • You will want to press the edges of the post-hole board into the leather so that it is a snug fit.
    • Be wary of gluing the excess overlap to the spine section.
    • I put books on top of the post-hole boards to help flatten the leather while it dried and also tucked that 2" excess into the pages so that it didn't glue to the spine section. 5b.png
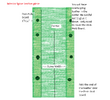
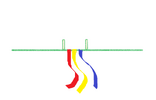
  16. After that is dry, you will then want to glue it to the inside of the spine. This will cover from top to bottom and your cardstock if you measured it to do so. First drawing shows top view, second drawing is how it should look from the bottom edge. 6.png7.png
  17. Next, you will want to glue your triangles to each corner.
    • You'll want to glue the triangle so that the long end is on the cover and the point is past the corner. 8.png
  18. After drying, flip the cover back over and make tiny slits in the triangle and glue the sides down.
  19. From here. all you need to do is glue down your desired end pages to cover up the remaining exposed bookboard and excess leather.
  20. After fully drying, you can decorate the exterior with your triquetra or other design elements and insert your pages.
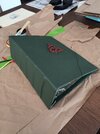
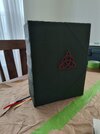
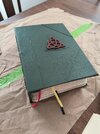
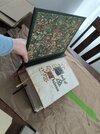
Here is my Charmed Book of Shadows:
IMG_20240815_085016796.jpg
IMG_20240815_085050875.jpgIMG_20240815_085147964_HDR.jpgIMG_20240815_085337931.jpgIMG_20240815_085414116.jpgIMG_20240815_094346455.jpgIMG_20240815_094421438_HDR.jpg
 
Back
Top