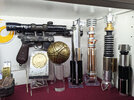
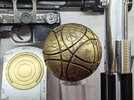
Interest Ahsoka - The Map ball - several options (grouped project Wonderknight & eethan)

Especially if the charging port/cord is integrated into a stand for the ball. The ball can charge while displayed and even better if it can light up on the stand. Either way, battery life would be more than acceptable. Would induction charging be overly complicated?
 
Especially if the charging port/cord is integrated into a stand for the ball. The ball can charge while displayed and even better if it can light up on the stand. Either way, battery life would be more than acceptable. Would induction charging be overly complicated?
alright, let me try to address batteries issues a bit as the previous message wasn't explaining everything :)

Julie did a LOT of testing for the electronics. The initial idea was to use a lit ball she found that was 7.6cm diameter, I based the whole 3D model on it so it would perfectly fit inside. This worked, however, the light was very weak and after a bit of testing, the batteries were dead. It was using 2 CR2032 to get 6V of power.
For further comparison, CR2032 batteries have roughtly 200mAh.

At this point, the light wasn't very powerful, but she was mostly worried about the battery life, so she started doing tests to use other batteries instead of the not very durable CR2032. The issue is that we need 6V to light up those leds, AA and AAA are only 1.5V, so she needed to use 4 of those to get to 6V.
And here comes the main issue, room inside the ball. There is 7.6cm of room inside the sphere, 4 AA batteries don't fit, so this ruled it out.
AAA batteries have approximatively 1250mAH, this is already 6 times supperior to the CR2032 batteries, so that's already pretty good. The issue is still size sadly, she needed to use a 4 AAA batterie holder, it already takes a lot of room, so you have to arrange leds around the batteries to avoid any dark spots on the ball. Without going into too many details, this voids the advantage of the extra life of the AAA batteries because we are now adding leds around the batteries and dividing the battery life each time, going back to the previous battery life we had before with the two small batteries and one powerfull led. So in the end, more work, more material, same result.

She also tried with a 9V battery alone, 9V batteries have approximatively 500mAh, which is not great and they start loosing power immediately, going toward 7-8V really fast. So this didn't work well at all and wasn't an improvement on battery life.

And finaly, you are mentioning actual charging batteries, we have searched everywhere, those are always too big to fit into the ball sadly. We also can't ship lithium batteries ever. so this is not possible sadly.

Julie then started working with DC12V stuff and she is now getting great result. She is using two rings of folded 5050 led strips and the light is super powerfull, finally giving a real lit feeling when you have it in your hand or laying on a table.

SO, in short, she will normally be offering two versions, one version with 2 CR2032 batteries and one led at the bottom of the ball. This will be seemless from the outside and will have a slightly weaker lit effect, but you will be able to take it into your hand, turn it on with the remote and so on. You'll need to open the ball to change the batteries when they run out.
And another version that will be DC12V, will have an awesome lit effect like showed before, that you can still take in your hand when not lit as the plug will be discrete, but it will have to be plugged to light up.
They will come at a different price point, the DC12V has a lot more material and work involved. The battery powered version will be as initially planned and will only use a very cheap led and remote, so the cost will be 98.5% Julie's work on the ball and not the electronics. Like I said to a person in a previous message that wanted to try himself at electronics, people can buy this version, it will light up, and they are free to remove the light inside the ball and replace it with anything else they can find. And worst case scenario, if it doesn't work, they can put back the provided light inside and get back to what they got in the first place.

Sorry for the long and technical message, this was to go into more details, I hope this helps a bit.
This summarizes easily 3 weeks of stressful testings for Julie, buying more stuff each time it was failing and getting pretty discouraged each time. The DC12V stuff was the light at the end of the tunnel and we are finally happy we can offer something really cool :)

cheers all!
 
Arrived safe and sound :)
Prints are clean. Gotta love resin.

IMG_9564.jpeg
 
Hi everyone :),

Just to let you know that I am in the process of printing the versions of the complete maps. For those who wanted complete unpainted ball kits (option 2), the kits will soon be available. During this time, I am making the versions with the painted bricks ready to stick on the megaminx (option 3).
I succeeded, I think, in solving my varnish problem (several thin diluted layers, instead of one big wet layer ;) ) and I reworked the color of the brass which I found too yellow with the added weathering ;)
I'll post some photos to keep you waiting :)

Cheers

IMG_0447.JPEG
IMG_0449.JPEG


IMG_0457.JPEG
IMG_0453.JPEG
 
The paint and weathering look great! I love the design of the support for the lighting system.
Thank you :) just to be clear with everyone, there is no weathering here, it's just the base chrome coats before the weathering.
Julie has pretty much validated the weathering as well and I think it looks really great. She should have photos to show soon enough :)
 
Awesome!
For those of us who bought unpainted versions, is there a possibility your process will be shared?

Thank you!
 
Awesome!
For those of us who bought unpainted versions, is there a possibility your process will be shared?

Thank you!
This is pretty much the process I explained on the previous page :)
Sanding, Tamiya gloss black, alclad chrome, alcohol tints mixed in liquitex high gloss varnish in several thin coats. Molotov marker on the few chrome highlighted details with a drop of liquitex varnish on the details again, and weathering on top of everything:)

Quite a few steps but the result is pretty awesome, I'm sure you guys will like it.

For the light up version, there is an additional step of masking all the engravings after the sanding which takes her about an hour time, and a black wash after the colour is done and before the weathering.

Sorry to be answering for Julie sometimes, it's just more efficient for both of us, but she's definitely the mastermind behind all the painting :)

Cheers
 
The painted tile kits arent available on the site yet right? I onyl see black and clear options.
 
The painted tile kits arent available on the site yet right? I onyl see black and clear options.
Hi Kylash,
The painted kits are not yet ready ;) , I am working on them.
I have just finished sanding the parts and I will be able to start painting them, there will also be a little drying time before sending to be sure that the varnish is completely dry.
I'm sorry it's progressing slowly, but I hope it will produce a great result :)
 
Gotcha so youre just selling what you have ready, not preorders. Thanks!
I'll quickly answer that one, there was the interest request to get an idea of what numbers of each versions were needed, now Julie is in production and will put things for sale on her website when she has them ready, with the possibility of a restock.
For now, only the tiles kits (option 1) are in stock and she is working on releasing full ball kits (option 2) and painted tiles (option 3). When this is released, she will be full steam on the painted and lit versions (option 5).
Cheers
 
Last edited:
Hello, just finding out about this. First of all, I love it! Second, what's the latest on the option 3 tiles?
 
Hello, just finding out about this. First of all, I love it! Second, what's the latest on the option 3 tiles?
Hi and thank you for your kind words

The option 3 (painted tile kits to attach to a real megaminx) is WIP at the moment, I am painting 5 kits right now that still need to be weathered.

Secondly, I just released Option 2 on my website, raw printed full balls. (just 3 for now, will do more if they sell out) They come in two halves that close seamlessly, supports were inside the half balls and were removed and sanded so the ball closes nicelly. The outside is pretty clean as there was no supports but will be perfect with a quick 600 grit sanding before painting.

final price is 110€ + shipping

Wonder Knight

Cheers :) ,

Julie
 
Hi everyone,

The painted kits ready to assemble on the Megaminx ( option3 ) are finally in stock on my website www.wonderknight.fr !!!!!

As there was not much interest in this option I only made 4.

Shipping costs are a bit high for this kit, sorry…. (40€ for the United States). But Colissimo provides a faster delivery service and better package insurance. I therefore prefer to only use this service for items above a certain value.

I hope you like my work, and here are some photos.


IMG_0585.jpg
IMG_0587.jpg
IMG_0589.JPEG


Back
Top